STEP-BY-STEP INSTRUCTIONS
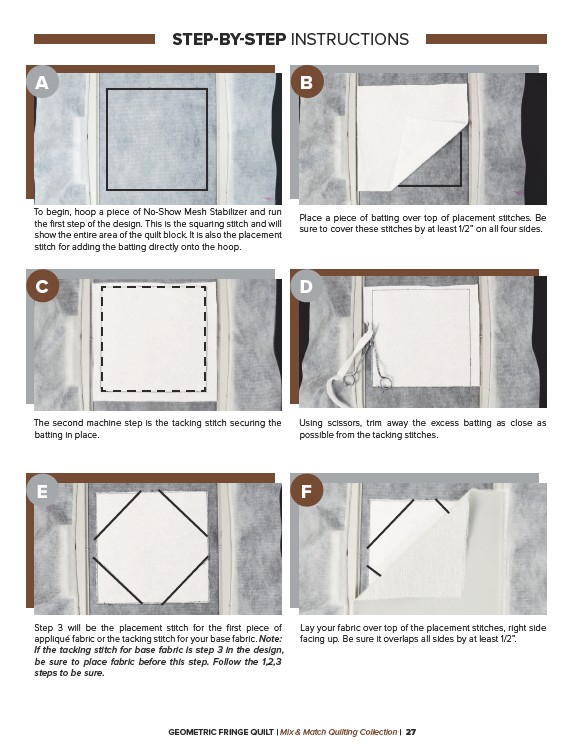
A B
Place a piece of batting over top of placement stitches. Be
sure to cover these stitches by at least 1/2” on all four sides.
C D
Using scissors, trim away the excess batting as close as
possible from the tacking stitches.
E F
Lay your fabric over top of the placement stitches, right side
facing up. Be sure it overlaps all sides by at least 1/2”.
To begin, hoop a piece of No-Show Mesh Stabilizer and run
the first step of the design. This is the squaring stitch and will
show the entire area of the quilt block. It is also the placement
stitch for adding the batting directly onto the hoop.
The second machine step is the tacking stitch securing the
batting in place.
Step 3 will be the placement stitch for the first piece of
appliqué fabric or the tacking stitch for your base fabric. Note:
If the tacking stitch for base fabric is step 3 in the design,
be sure to place fabric before this step. Follow the 1,2,3
steps to be sure.
GEOMETRIC FRINGE QUILT | Mix & Match Quilting Collection | 27