STEP-BY-STEP INSTRUCTIONS
M N
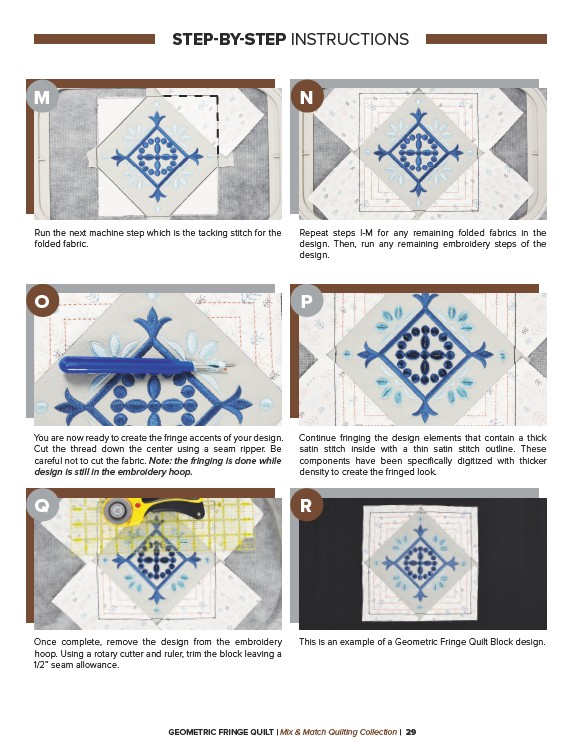
Repeat steps I-M for any remaining folded fabrics in the
design. Then, run any remaining embroidery steps of the
design.
O P
Continue fringing the design elements that contain a thick
satin stitch inside with a thin satin stitch outline. These
components have been specifically digitized with thicker
density to create the fringed look.
Run the next machine step which is the tacking stitch for the
folded fabric.
You are now ready to create the fringe accents of your design.
Cut the thread down the center using a seam ripper. Be
careful not to cut the fabric. Note: the fringing is done while
design is still in the embroidery hoop.
Q R
Once complete, remove the design from the embroidery This is an example of a Geometric Fringe Quilt Block design.
hoop. Using a rotary cutter and ruler, trim the block leaving a
1/2” seam allowance.
GEOMETRIC FRINGE QUILT | Mix & Match Quilting Collection | 29