Printing Anita’s Your Wonderland Own Fabric | Overview
| Tutorial
When using printed fabric, it is important to remember that
every printer and computer is slightly different, so these are
general instructions to give you an idea of how easy it is to use
this technique!
First, open the file from your CD-ROM. All of our printable files
are in PDF format which can be opened and printed using
Adobe Reader. This is a free program you can download at
www.get.adobe.com/reader if you do not already have it.
The printer should be set to a normal quality, plain paper
setting unless specified otherwise by the manufacturer of the
printable fabric you are using.
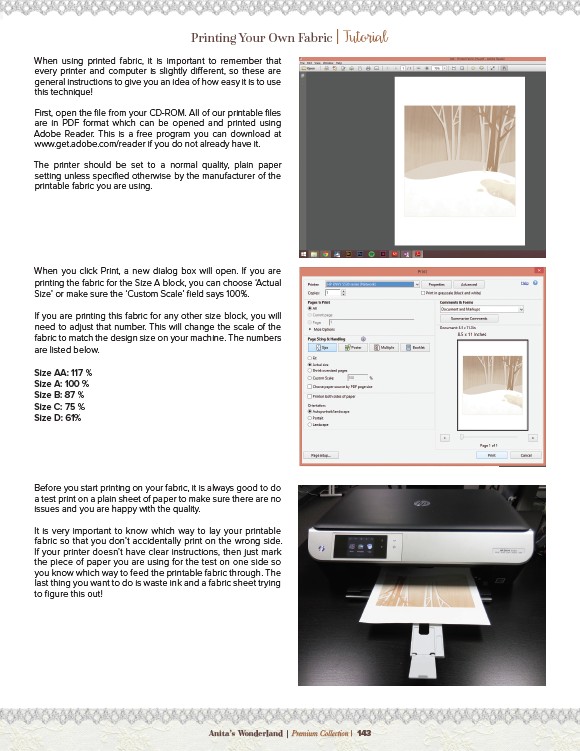
When you click Print, a new dialog box will open. If you are
printing the fabric for the Size A block, you can choose ‘Actual
Size’ or make sure the ‘Custom Scale’ field says 100%.
If you are printing this fabric for any other size block, you will
need to adjust that number. This will change the scale of the
fabric to match the design size on your machine. The numbers
are listed below.
Size AA: 117 %
Size A: 100 %
Size B: 87 %
Size C: 75 %
Size D: 61%
Before you start printing on your fabric, it is always good to do
a test print on a plain sheet of paper to make sure there are no
issues and you are happy with the quality.
It is very important to know which way to lay your printable
fabric so that you don’t accidentally print on the wrong side.
If your printer doesn’t have clear instructions, then just mark
the piece of paper you are using for the test on one side so
you know which way to feed the printable fabric through. The
last thing you want to do is waste ink and a fabric sheet trying
to figure this out!
Anita’s Wonderland | Premium Collection | 143