Printed Anita’s Wonderland Fabric Blocks | Overview
| Tutorial
A B
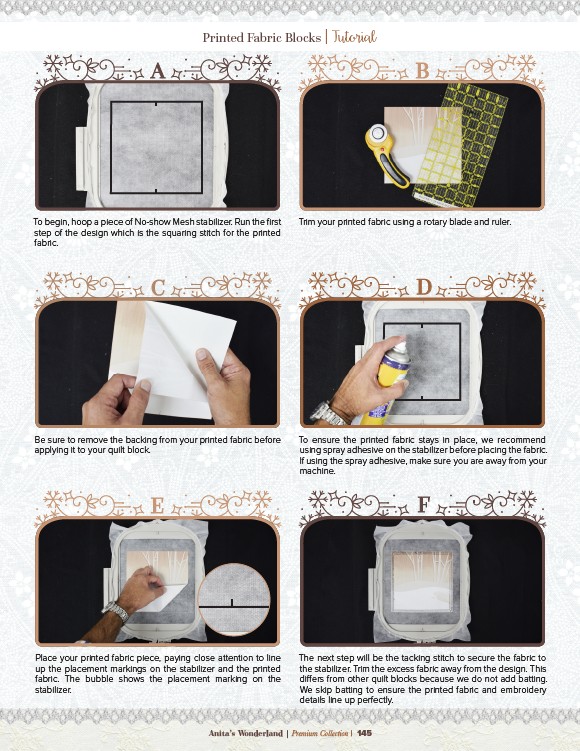
Trim your printed fabric using a rotary blade and ruler.
To ensure the printed fabric stays in place, we recommend
using spray adhesive on the stabilizer before placing the fabric.
If using the spray adhesive, make sure you are away from your
machine.
The next step will be the tacking stitch to secure the fabric to
the stabilizer. Trim the excess fabric away from the design. This
differs from other quilt blocks because we do not add batting.
We skip batting to ensure the printed fabric and embroidery
details line up perfectly.
To begin, hoop a piece of No-show Mesh stabilizer. Run the first
step of the design which is the squaring stitch for the printed
fabric.
C
Be sure to remove the backing from your printed fabric before
applying it to your quilt block.
Place your printed fabric piece, paying close attention to line
up the placement markings on the stabilizer and the printed
fabric. The bubble shows the placement marking on the
stabilizer.
Anita’s Wonderland | Premium Collection | 145
D
E F