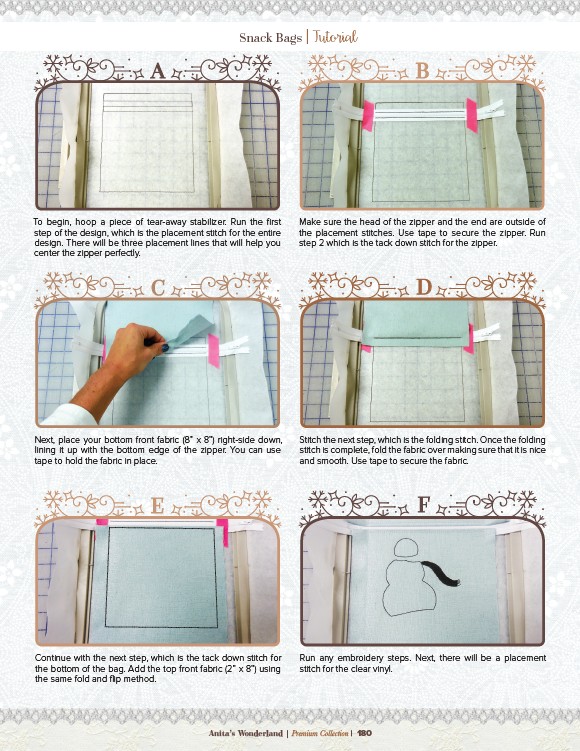
Anita’s Wonderland | Overview Anita’s Snack Bags | Tutorial Make sure the head of the zipper and the end are outside of
A B
the placement stitches. Use tape to secure the zipper. Run
step 2 which is the tack down stitch for the zipper.
Stitch the next step, which is the folding stitch. Once the folding
stitch is complete, fold the fabric over making sure that it is nice
and smooth. Use tape to secure the fabric.
Run any embroidery steps. Next, there will be a placement
stitch for the clear vinyl.
To begin, hoop a piece of tear-away stabilizer. Run the first
step of the design, which is the placement stitch for the entire
design. There will be three placement lines that will help you
center the zipper perfectly.
C
Next, place your bottom front fabric (8” x 8”) right-side down,
lining it up with the bottom edge of the zipper. You can use
tape to hold the fabric in place.
Continue with the next step, which is the tack down stitch for
the bottom of the bag. Add the top front fabric (2” x 8”) using
the same fold and flip method.
Wonderland | Premium Collection | 180
D
E F