Anita’s Drawstring Wonderland Bags | |Tutorial
Overview
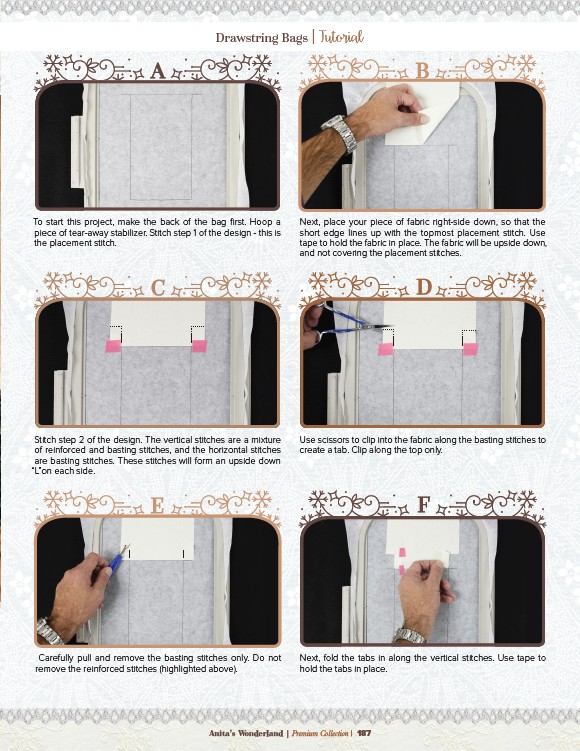
A B
Next, place your piece of fabric right-side down, so that the
short edge lines up with the topmost placement stitch. Use
tape to hold the fabric in place. The fabric will be upside down,
and not covering the placement stitches.
C D
Use scissors to clip into the fabric along the basting stitches to
create a tab. Clip along the top only.
E F
Next, fold the tabs in along the vertical stitches. Use tape to
hold the tabs in place.
To start this project, make the back of the bag first. Hoop a
piece of tear-away stabilizer. Stitch step 1 of the design - this is
the placement stitch.
Stitch step 2 of the design. The vertical stitches are a mixture
of reinforced and basting stitches, and the horizontal stitches
are basting stitches. These stitches will form an upside down
“L”on each side.
Carefully pull and remove the basting stitches only. Do not
remove the reinforced stitches (highlighted above).
Anita’s Wonderland | Premium Collection | 187