Anita’s Drawstring Wonderland Bags | |Tutorial
Overview
M N
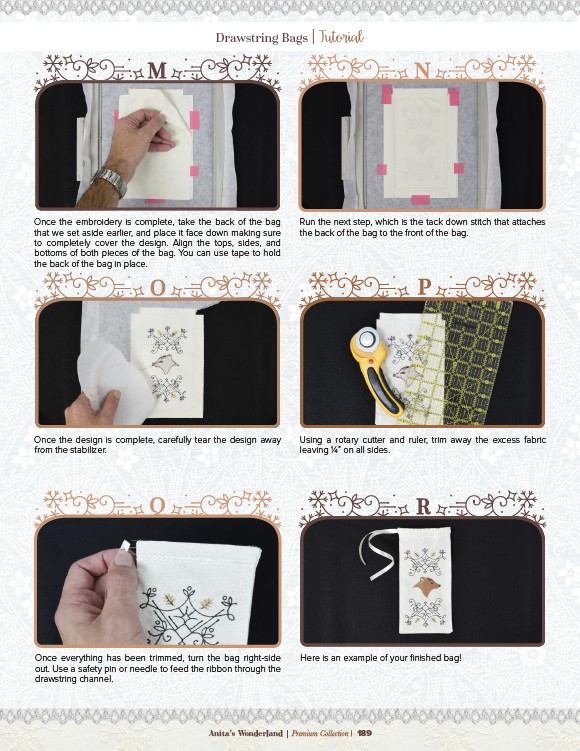
Run the next step, which is the tack down stitch that attaches
the back of the bag to the front of the bag.
O P
Using a rotary cutter and ruler, trim away the excess fabric
leaving ¼” on all sides.
Once the embroidery is complete, take the back of the bag
that we set aside earlier, and place it face down making sure
to completely cover the design. Align the tops, sides, and
bottoms of both pieces of the bag. You can use tape to hold
the back of the bag in place.
Once the design is complete, carefully tear the design away
from the stabilizer.
Q R
Once everything has been trimmed, turn the bag right-side
out. Use a safety pin or needle to feed the ribbon through the
drawstring channel.
Here is an example of your finished bag!
Anita’s Wonderland | Premium Collection | 189