Anita’s Napkin Wonderland Rings | Tutorial
| Overview
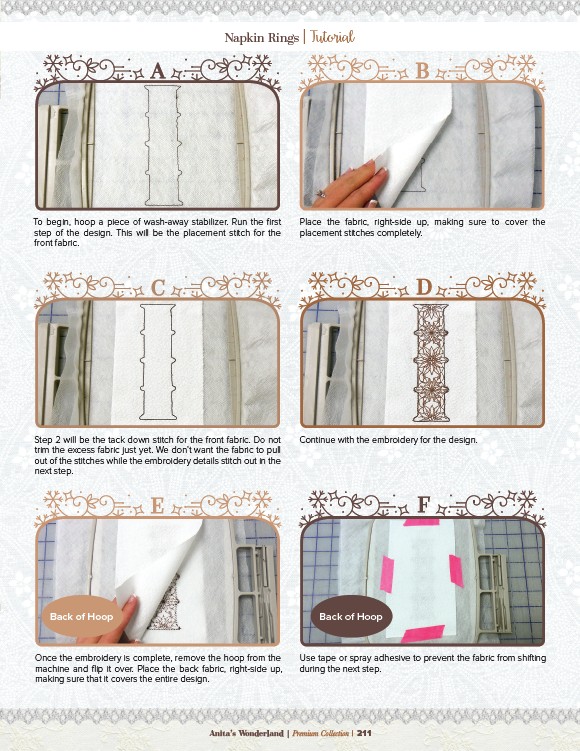
B
Place the fabric, right-side up, making sure to cover the
placement stitches completely.
Continue with the embroidery for the design.
Use tape or spray adhesive to prevent the fabric from shifting
during the next step.
A
To begin, hoop a piece of wash-away stabilizer. Run the first
step of the design. This will be the placement stitch for the
front fabric.
C
Step 2 will be the tack down stitch for the front fabric. Do not
trim the excess fabric just yet. We don’t want the fabric to pull
out of the stitches while the embroidery details stitch out in the
next step.
Once the embroidery is complete, remove the hoop from the
machine and flip it over. Place the back fabric, right-side up,
making sure that it covers the entire design.
Anita’s Wonderland | Premium Collection | 211
D
E F
Back of Hoop Back of Hoop