STEP-BY-STEP INSTRUCTIONS
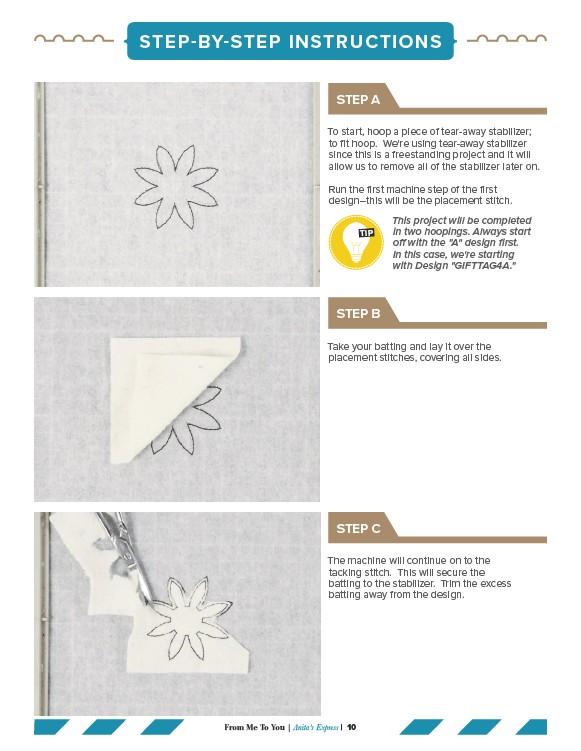
To start, hoop a piece of tear-away stabilizer;
to fit hoop. We're using tear-away stabilizer
since this is a freestanding project and it will
allow us to remove all of the stabilizer later on.
Run the first machine step of the first
design–this will be the placement stitch.
TIP
Take your batting and lay it over the
placement stitches, covering all sides.
The machine will continue on to the
tacking stitch. This will secure the
batting to the stabilizer. Trim the excess
batting away from the design.
From Me To You | Anita’s Express | 10
This project will be completed
in two hoopings. Always start
off with the "A" design first.
In this case, we're starting
with Design "GIFTTAG4A."
STEP A
STEP B
STEP C