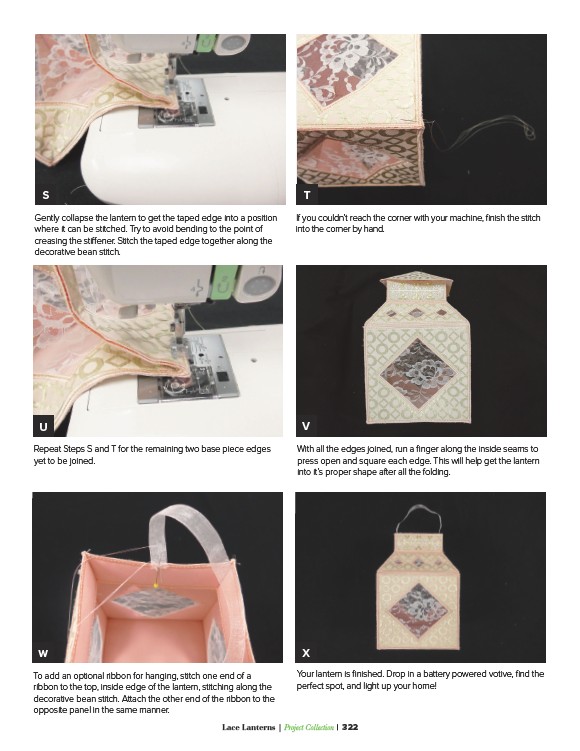
Gently collapse the lantern to get the taped edge into a position
where it can be stitched. Try to avoid bending to the point of
creasing the stiffener. Stitch the taped edge together along the
decorative bean stitch.
U V
Repeat Steps S and T for the remaining two base piece edges
yet to be joined.
T
If you couldn’t reach the corner with your machine, finish the stitch
into the corner by hand.
With all the edges joined, run a finger along the inside seams to
press open and square each edge. This will help get the lantern
into it’s proper shape after all the folding.
W X
Lace Lanterns | Project Collection | 322
S
To add an optional ribbon for hanging, stitch one end of a
ribbon to the top, inside edge of the lantern, stitching along the
decorative bean stitch. Attach the other end of the ribbon to the
opposite panel in the same manner.
Your lantern is finished. Drop in a battery powered votive, find the
perfect spot, and light up your home!