PRETTYING YOUR POTS
1 2
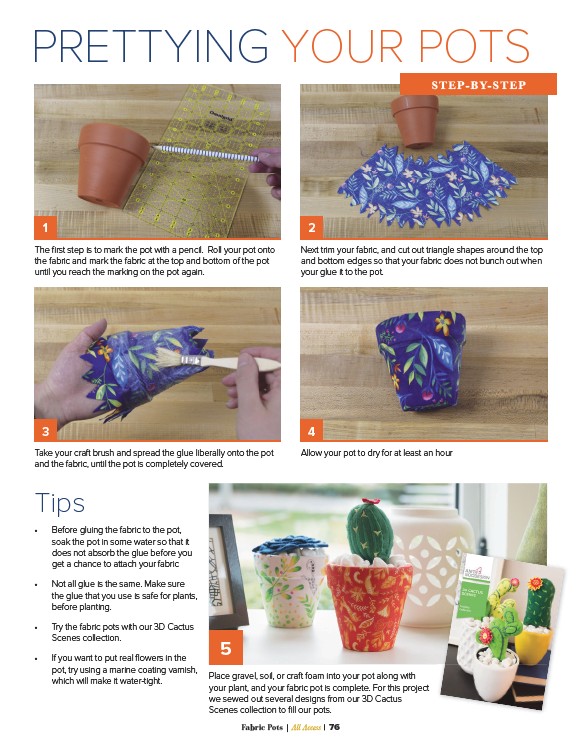
The first step is to mark the pot with a pencil. Roll your pot onto
the fabric and mark the fabric at the top and bottom of the pot
until you reach the marking on the pot again.
3 4
Take your craft brush and spread the glue liberally onto the pot
and the fabric, until the pot is completely covered.
Fabric Pots | All Access | 76
Tips
STEP-BY-STEP
Next trim your fabric, and cut out triangle shapes around the top
and bottom edges so that your fabric does not bunch out when
your glue it to the pot.
Allow your pot to dry for at least an hour
• Before gluing the fabric to the pot,
soak the pot in some water so that it
does not absorb the glue before you
get a chance to attach your fabric
• Not all glue is the same. Make sure
the glue that you use is safe for plants,
before planting.
• Try the fabric pots with our 3D Cactus
Scenes collection.
• If you want to put real flowers in the
pot, try using a marine coating varnish,
which will make it water-tight.
5
Place gravel, soil, or craft foam into your pot along with
your plant, and your fabric pot is complete. For this project
we sewed out several designs from our 3D Cactus
Scenes collection to fill our pots.