STEP-BY-STEP INSTRUCTIONS
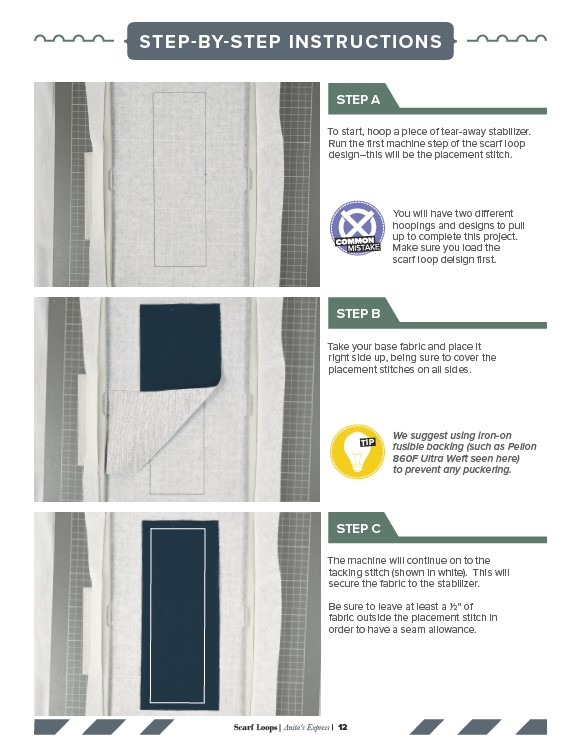
STEP A
To start, hoop a piece of tear-away stabilizer.
Run the first machine step of the scarf loop
design–this will be the placement stitch.
STEP B
Take your base fabric and place it
right side up, being sure to cover the
placement stitches on all sides.
STEP C
The machine will continue on to the
tacking stitch (shown in white). This will
secure the fabric to the stabilizer.
Be sure to leave at least a 1⁄2" of
fabric outside the placement stitch in
order to have a seam allowance.
Scarf Loops| Anita's Express | 12
We suggest using iron-on
fusible backing (such as Pellon
860F Ultra Weft seen here)
to prevent any puckering.
TIP
You will have two different
hoopings and designs to pull
up to complete this project.
Make sure you load the
scarf loop deisign first.