STEP-BY-STEP INSTRUCTIONS
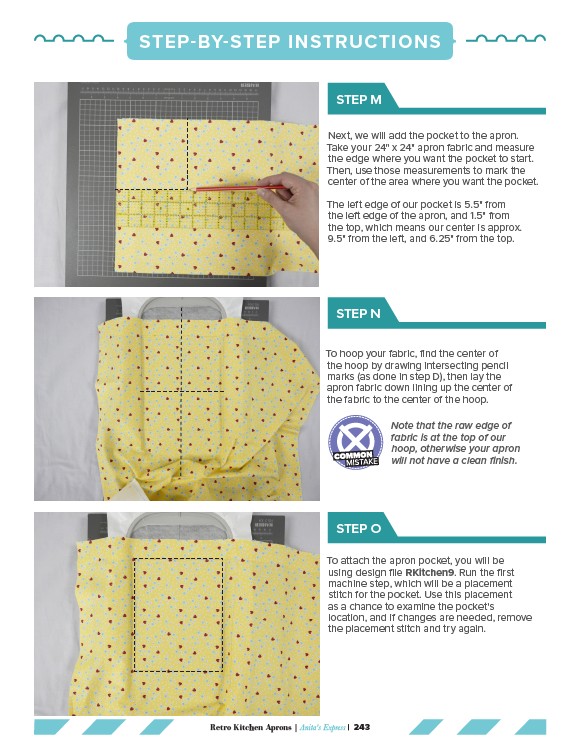
Next, we will add the pocket to the apron.
Take your 24" x 24" apron fabric and measure
the edge where you want the pocket to start.
Then, use those measurements to mark the
center of the area where you want the pocket.
The left edge of our pocket is 5.5" from
the left edge of the apron, and 1.5" from
the top, which means our center is approx.
9.5" from the left, and 6.25" from the top.
To hoop your fabric, find the center of
the hoop by drawing intersecting pencil
marks (as done in step D), then lay the
apron fabric down lining up the center of
the fabric to the center of the hoop.
To attach the apron pocket, you will be
using design file RKitchen9. Run the first
machine step, which will be a placement
stitch for the pocket. Use this placement
as a chance to examine the pocket's
location, and if changes are needed, remove
the placement stitch and try again.
Retro Kitchen Aprons | Anita's Express | 243
Note that the raw edge of
fabric is at the top of our
hoop, otherwise your apron
will not have a clean finish.
STEP M
STEP N
STEP O