STEP-BY-STEP INSTRUCTIONS
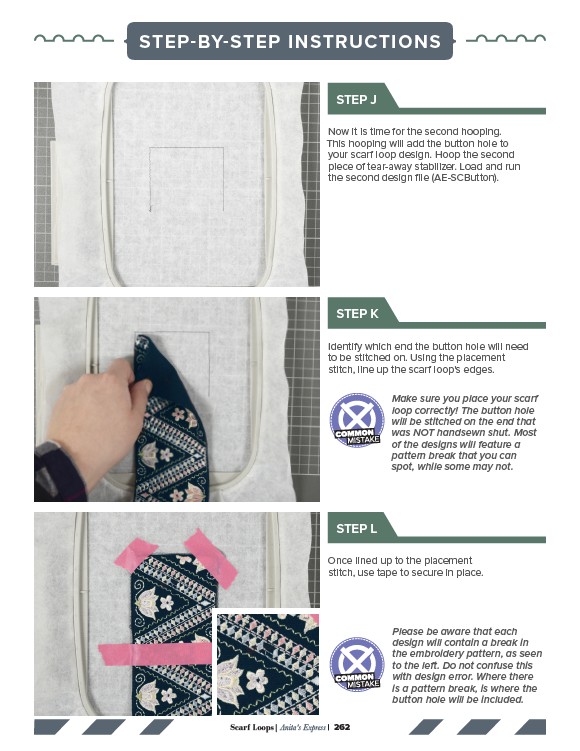
STEP J
Now it is time for the second hooping.
This hooping will add the button hole to
your scarf loop design. Hoop the second
piece of tear-away stabilizer. Load and run
the second design file (AE-SCButton).
STEP K
Identify which end the button hole will need
to be stitched on. Using the placement
stitch, line up the scarf loop's edges.
STEP L
Once lined up to the placement
stitch, use tape to secure in place.
Scarf Loops| Anita's Express | 262
Make sure you place your scarf
loop correctly! The button hole
will be stitched on the end that
was NOT handsewn shut. Most
of the designs will feature a
pattern break that you can
spot, while some may not.
Please be aware that each
design will contain a break in
the embroidery pattern, as seen
to the left. Do not confuse this
with design error. Where there
is a pattern break, is where the
button hole will be included.