CREATING A PET
STEP BY STEP INSTRUCTIONS
KK LL
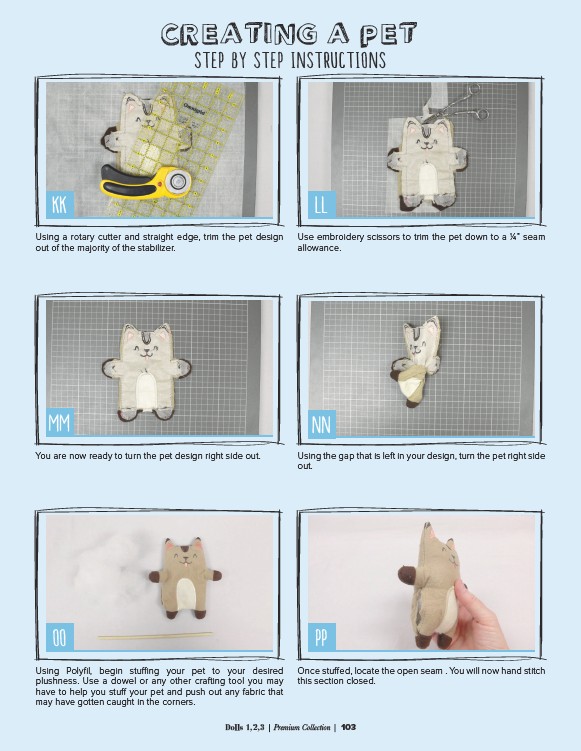
Using a rotary cutter and straight edge, trim the pet design
out of the majority of the stabilizer.
Use embroidery scissors to trim the pet down to a 1⁄4” seam
allowance.
MM NN
You are now ready to turn the pet design right side out. Using the gap that is left in your design, turn the pet right side
out.
OO PP
Using Polyfil, begin stuffing your pet to your desired
plushness. Use a dowel or any other crafting tool you may
have to help you stuff your pet and push out any fabric that
may have gotten caught in the corners.
Once stuffed, locate the open seam . You will now hand stitch
this section closed.
Dolls 1,2,3 | Premium Collection | 103