CREATING A HANDHELD DEVICE
STEP BY STEP INSTRUCTIONS
Y Z
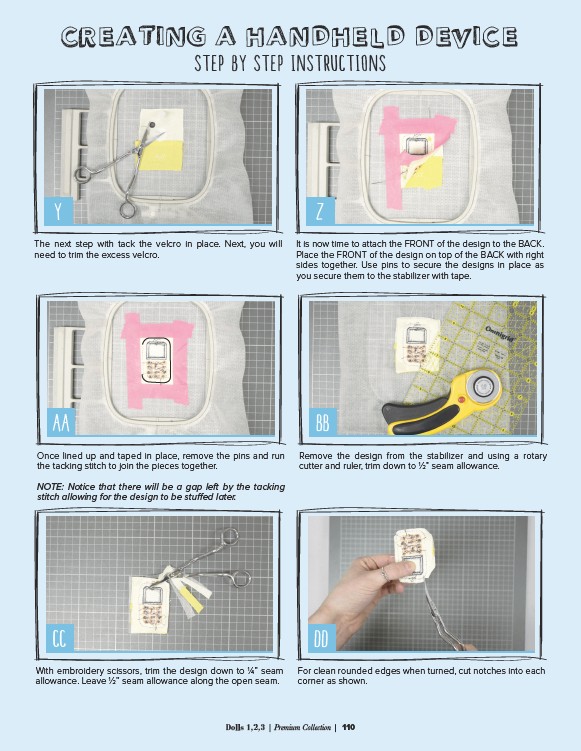
The next step with tack the velcro in place. Next, you will
need to trim the excess velcro.
It is now time to attach the FRONT of the design to the BACK.
Place the FRONT of the design on top of the BACK with right
sides together. Use pins to secure the designs in place as
you secure them to the stabilizer with tape.
AA BB
Once lined up and taped in place, remove the pins and run
the tacking stitch to join the pieces together.
NOTE: Notice that there will be a gap left by the tacking
stitch allowing for the design to be stuffed later.
Remove the design from the stabilizer and using a rotary
cutter and ruler, trim down to 1⁄2” seam allowance.
CC DD
With embroidery scissors, trim the design down to 1⁄4” seam
allowance. Leave 1⁄2” seam allowance along the open seam.
For clean rounded edges when turned, cut notches into each
corner as shown.
Dolls 1,2,3 | Premium Collection | 110