CREATING A BAG
STEP BY STEP INSTRUCTIONS
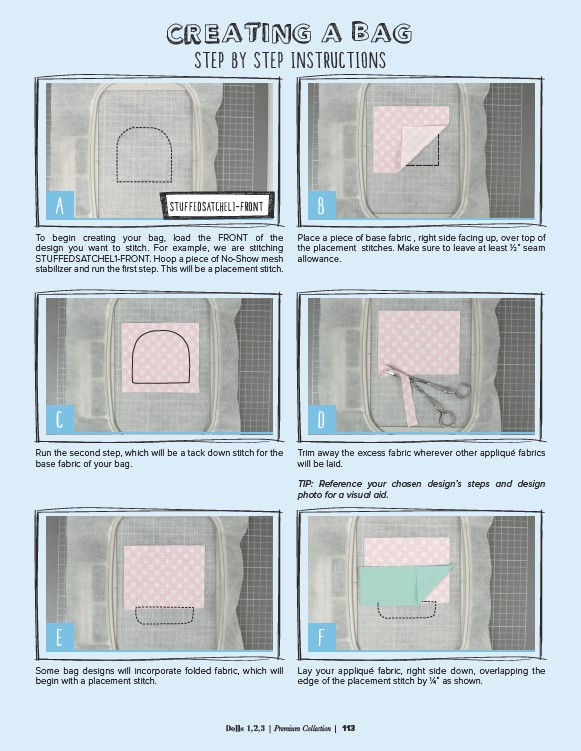
A STUFFEDSATCHEL1-FRONT
B
To begin creating your bag, load the FRONT of the
design you want to stitch. For example, we are stitching
STUFFEDSATCHEL1-FRONT. Hoop a piece of No-Show mesh
stabilizer and run the first step. This will be a placement stitch.
Place a piece of base fabric , right side facing up, over top of
the placement stitches. Make sure to leave at least 1⁄2” seam
allowance.
C D
Run the second step, which will be a tack down stitch for the
base fabric of your bag.
Trim away the excess fabric wherever other appliqué fabrics
will be laid.
TIP: Reference your chosen design’s steps and design
photo for a visual aid.
E F
Some bag designs will incorporate folded fabric, which will
begin with a placement stitch.
Lay your appliqué fabric, right side down, overlapping the
edge of the placement stitch by 1⁄4” as shown.
Dolls 1,2,3 | Premium Collection | 113