CREATING A BAG
STEP BY STEP INSTRUCTIONS
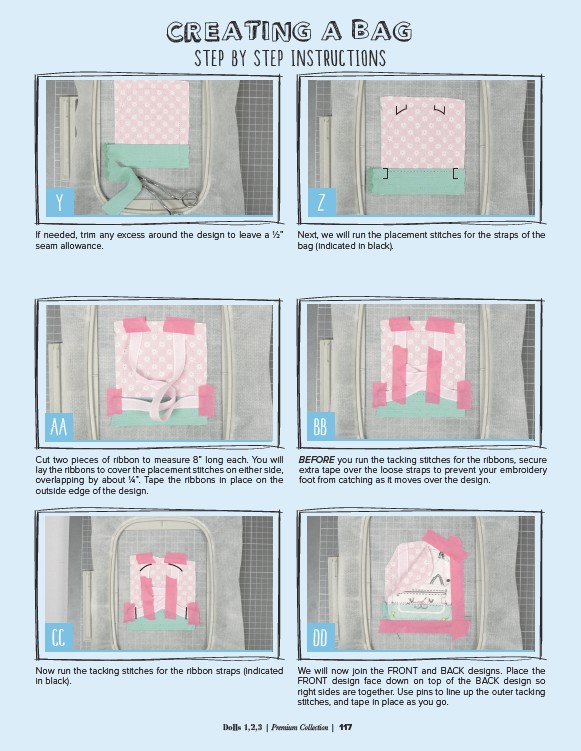
Y Z
If needed, trim any excess around the design to leave a 1⁄2”
seam allowance.
Next, we will run the placement stitches for the straps of the
bag (indicated in black).
AA BB
Cut two pieces of ribbon to measure 8” long each. You will
lay the ribbons to cover the placement stitches on either side,
overlapping by about 1⁄4”. Tape the ribbons in place on the
outside edge of the design.
BEFORE you run the tacking stitches for the ribbons, secure
extra tape over the loose straps to prevent your embroidery
foot from catching as it moves over the design.
CC DD
Now run the tacking stitches for the ribbon straps (indicated
in black).
We will now join the FRONT and BACK designs. Place the
FRONT design face down on top of the BACK design so
right sides are together. Use pins to line up the outer tacking
stitches, and tape in place as you go.
Dolls 1,2,3 | Premium Collection | 117