LEARN TO MAKE: A SCARF
STEP BY STEP INSTRUCTIONS
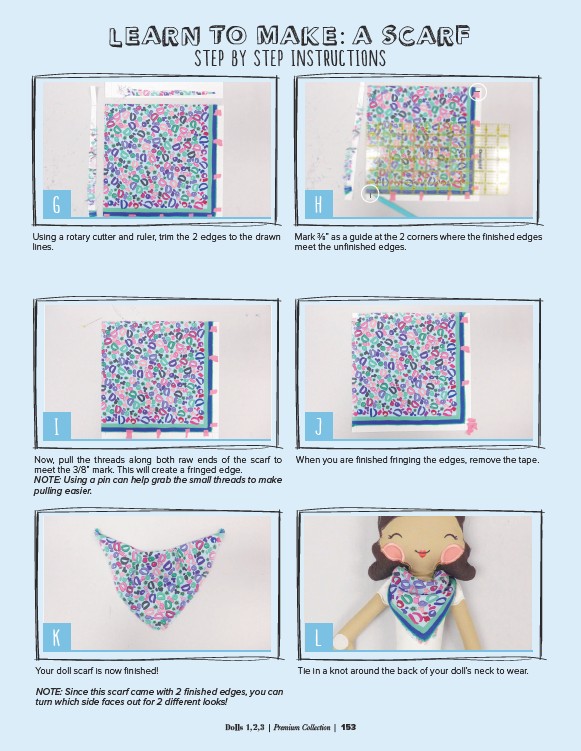
G H
Using a rotary cutter and ruler, trim the 2 edges to the drawn
lines.
Mark 3⁄8” as a guide at the 2 corners where the finished edges
meet the unfinished edges.
I J
Now, pull the threads along both raw ends of the scarf to
meet the 3/8” mark. This will create a fringed edge.
NOTE: Using a pin can help grab the small threads to make
pulling easier.
When you are finished fringing the edges, remove the tape.
K L
Your doll scarf is now finished!
NOTE: Since this scarf came with 2 finished edges, you can
turn which side faces out for 2 different looks!
Tie in a knot around the back of your doll’s neck to wear.
Dolls 1,2,3 | Premium Collection | 153