step by step instructions
G H
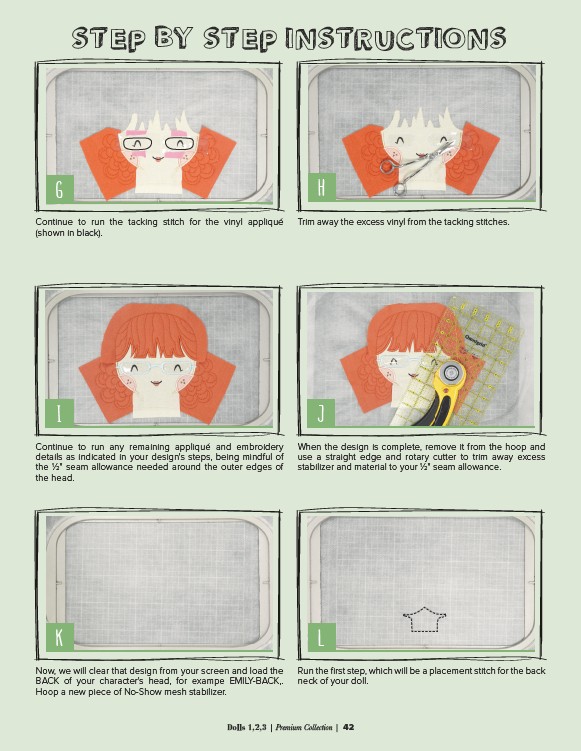
Continue to run the tacking stitch for the vinyl appliqué
(shown in black).
Trim away the excess vinyl from the tacking stitches.
I J
Continue to run any remaining appliqué and embroidery
details as indicated in your design's steps, being mindful of
the 1⁄2" seam allowance needed around the outer edges of
the head.
When the design is complete, remove it from the hoop and
use a straight edge and rotary cutter to trim away excess
stabilizer and material to your 1⁄2" seam allowance.
K L
Now, we will clear that design from your screen and load the
BACK of your character's head, for exampe EMILY-BACK,.
Hoop a new piece of No-Show mesh stabilizer.
Run the first step, which will be a placement stitch for the back
neck of your doll.
Dolls 1,2,3 | Premium Collection | 42