step by step instructions
S T
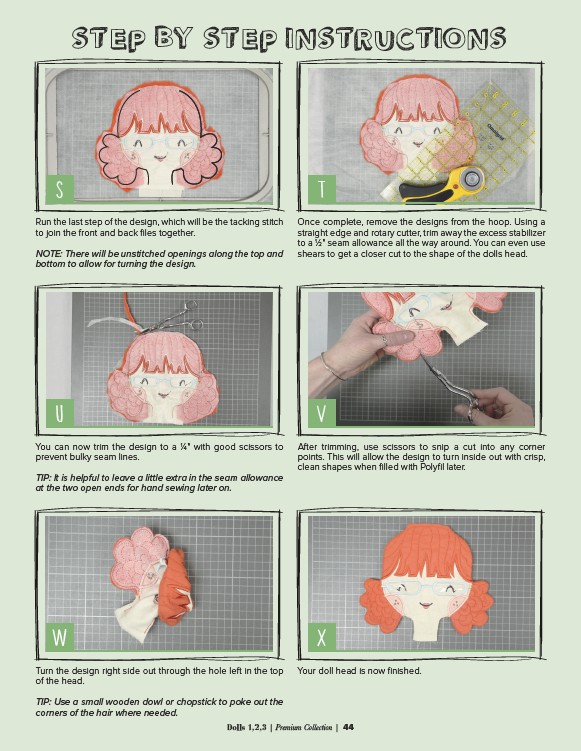
Run the last step of the design, which will be the tacking stitch
to join the front and back files together.
NOTE: There will be unstitched openings along the top and
bottom to allow for turning the design.
Once complete, remove the designs from the hoop. Using a
straight edge and rotary cutter, trim away the excess stabilizer
to a 1⁄2" seam allowance all the way around. You can even use
shears to get a closer cut to the shape of the dolls head.
U V
You can now trim the design to a 1⁄4" with good scissors to
prevent bulky seam lines.
TIP: It is helpful to leave a little extra in the seam allowance
at the two open ends for hand sewing later on.
After trimming, use scissors to snip a cut into any corner
points. This will allow the design to turn inside out with crisp,
clean shapes when filled with Polyfil later.
W X
Turn the design right side out through the hole left in the top
of the head.
TIP: Use a small wooden dowl or chopstick to poke out the
corners of the hair where needed.
Your doll head is now finished.
Dolls 1,2,3 | Premium Collection | 44