CREATING YOUR DOLL BODY
STEP BY STEP INSTRUCTIONS
Y Z
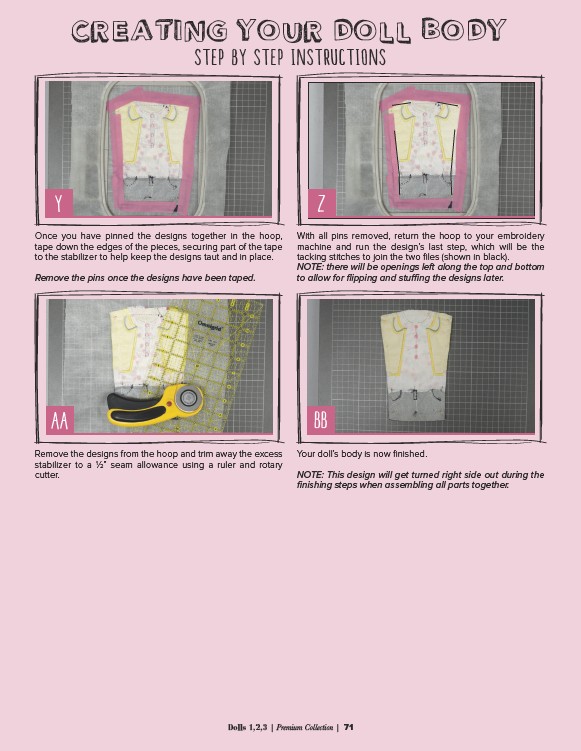
Once you have pinned the designs together in the hoop,
tape down the edges of the pieces, securing part of the tape
to the stabilizer to help keep the designs taut and in place.
Remove the pins once the designs have been taped.
With all pins removed, return the hoop to your embroidery
machine and run the design’s last step, which will be the
tacking stitches to join the two files (shown in black).
NOTE: there will be openings left along the top and bottom
to allow for flipping and stuffing the designs later.
AA BB
Remove the designs from the hoop and trim away the excess
stabilizer to a 1⁄2” seam allowance using a ruler and rotary
cutter.
Your doll’s body is now finished.
NOTE: This design will get turned right side out during the
finishing steps when assembling all parts together.
Dolls 1,2,3 | Premium Collection | 71