CREATING THE ARMS
STEP BY STEP INSTRUCTIONS
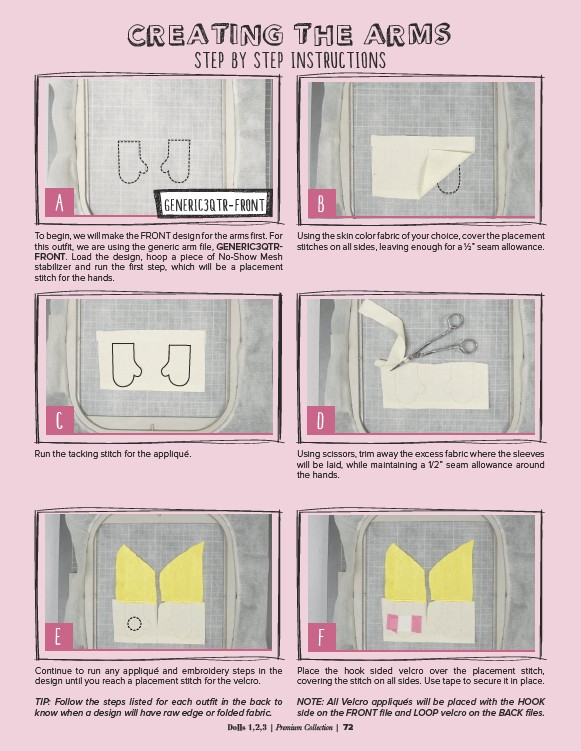
To begin, we will make the FRONT design for the arms first. For
this outfit, we are using the generic arm file, GENERIC3QTRFRONT.
Load the design, hoop a piece of No-Show Mesh
stabilizer and run the first step, which will be a placement
stitch for the hands.
B
Using the skin color fabric of your choice, cover the placement
stitches on all sides, leaving enough for a 1⁄2” seam allowance.
C D
Run the tacking stitch for the appliqué. Using scissors, trim away the excess fabric where the sleeves
will be laid, while maintaining a 1/2” seam allowance around
the hands.
E F
Continue to run any appliqué and embroidery steps in the
design until you reach a placement stitch for the velcro.
TIP: Follow the steps listed for each outfit in the back to
know when a design will have raw edge or folded fabric.
Place the hook sided velcro over the placement stitch,
covering the stitch on all sides. Use tape to secure it in place.
NOTE: All Velcro appliqués will be placed with the HOOK
side on the FRONT file and LOOP velcro on the BACK files.
A GENERIC3QTR-FRONT
Dolls 1,2,3 | Premium Collection | 72