CREATING THE LEGS
STEP BY STEP INSTRUCTIONS
G H
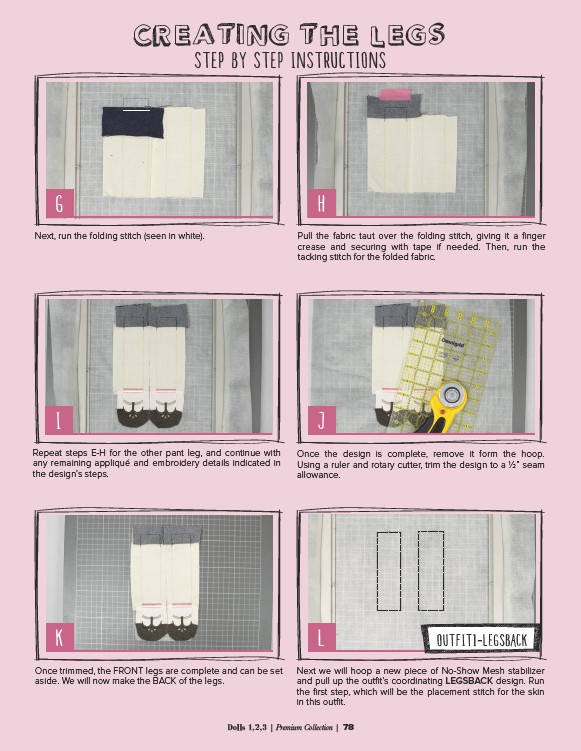
Next, run the folding stitch (seen in white). Pull the fabric taut over the folding stitch, giving it a finger
crease and securing with tape if needed. Then, run the
tacking stitch for the folded fabric.
I J
Repeat steps E-H for the other pant leg, and continue with
any remaining appliqué and embroidery details indicated in
the design’s steps.
Once the design is complete, remove it form the hoop.
Using a ruler and rotary cutter, trim the design to a 1⁄2” seam
allowance.
K L
Once trimmed, the FRONT legs are complete and can be set
aside. We will now make the BACK of the legs.
OUTFIT1-LEGSBACK
Next we will hoop a new piece of No-Show Mesh stabilizer
and pull up the outfit’s coordinating LEGSBACK design. Run
the first step, which will be the placement stitch for the skin
in this outfit.
Dolls 1,2,3 | Premium Collection | 78