Printed Fabric
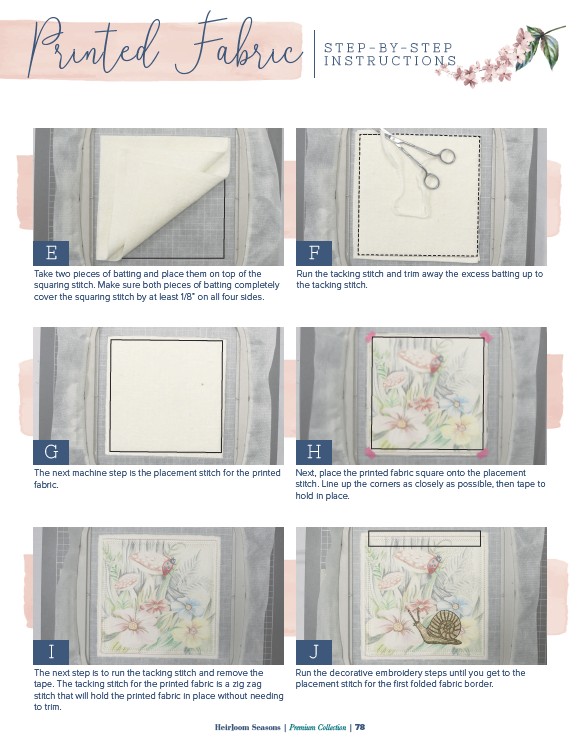
Take two pieces of batting and place them on top of the
squaring stitch. Make sure both pieces of batting completely
cover the squaring stitch by at least 1/8” on all four sides.
The next machine step is the placement stitch for the printed
fabric.
The next step is to run the tacking stitch and remove the
tape. The tacking stitch for the printed fabric is a zig zag
stitch that will hold the printed fabric in place without needing
to trim.
Run the tacking stitch and trim away the excess batting up to
the tacking stitch.
Next, place the printed fabric square onto the placement
stitch. Line up the corners as closely as possible, then tape to
hold in place.
Run the decorative embroidery steps until you get to the
placement stitch for the first folded fabric border.
Heirloom Seasons | Premium Collection | 78
E
G
I
F
H
J
S T E P - B Y- S T E P
I N S T RU C T ION S