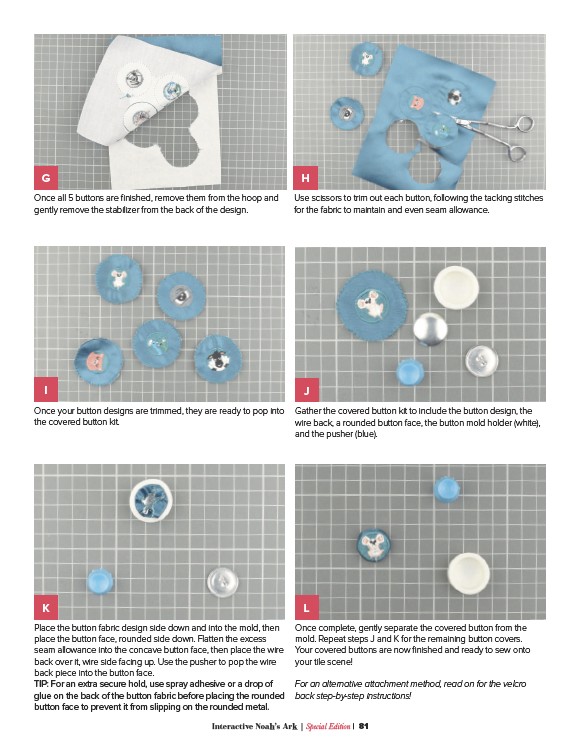
Once all 5 buttons are finished, remove them from the hoop and
gently remove the stabilizer from the back of the design.
Once your button designs are trimmed, they are ready to pop into
the covered button kit.
H
Use scissors to trim out each button, following the tacking stitches
for the fabric to maintain and even seam allowance.
L
Interactive Noah’s Ark | Special Edition | 81
G
I
Gather the covered button kit to include the button design, the
wire back, a rounded button face, the button mold holder (white),
and the pusher (blue).
Place the button fabric design side down and into the mold, then
place the button face, rounded side down. Flatten the excess
seam allowance into the concave button face, then place the wire
back over it, wire side facing up. Use the pusher to pop the wire
back piece into the button face.
TIP: For an extra secure hold, use spray adhesive or a drop of
glue on the back of the button fabric before placing the rounded
button face to prevent it from slipping on the rounded metal.
J
K
Once complete, gently separate the covered button from the
mold. Repeat steps J and K for the remaining button covers.
Your covered buttons are now finished and ready to sew onto
your tile scene!
For an alternative attachment method, read on for the velcro
back step-by-step instructions!