S T
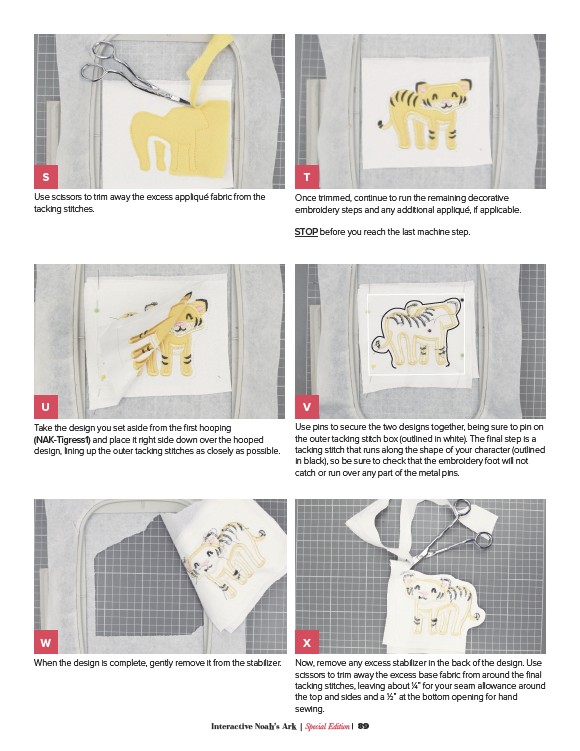
Use scissors to trim away the excess appliqué fabric from the
tacking stitches.
Once trimmed, continue to run the remaining decorative
embroidery steps and any additional appliqué, if applicable.
STOP before you reach the last machine step.
U V
Take the design you set aside from the first hooping
(NAK-Tigress1) and place it right side down over the hooped
design, lining up the outer tacking stitches as closely as possible.
Use pins to secure the two designs together, being sure to pin on
the outer tacking stitch box (outlined in white). The final step is a
tacking stitch that runs along the shape of your character (outlined
in black), so be sure to check that the embroidery foot will not
catch or run over any part of the metal pins.
W X
When the design is complete, gently remove it from the stabilizer. Now, remove any excess stabilizer in the back of the design. Use
scissors to trim away the excess base fabric from around the final
tacking stitches, leaving about 1⁄4” for your seam allowance around
the top and sides and a 1⁄2” at the bottom opening for hand
sewing.
Interactive Noah’s Ark | Special Edition | 89