M N
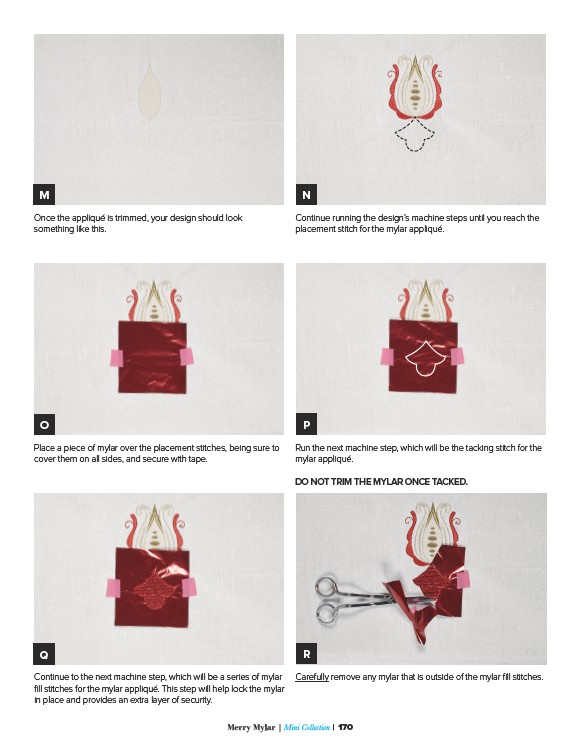
Once the appliqué is trimmed, your design should look
something like this.
O P
Place a piece of mylar over the placement stitches, being sure to
cover them on all sides, and secure with tape.
Continue running the design’s machine steps until you reach the
placement stitch for the mylar appliqué.
Run the next machine step, which will be the tacking stitch for the
mylar appliqué.
DO NOT TRIM THE MYLAR ONCE TACKED.
R
Carefully remove any mylar that is outside of the mylar fill stitches.
Q
Continue to the next machine step, which will be a series of mylar
fill stitches for the mylar appliqué. This step will help lock the mylar
in place and provides an extra layer of security.
Merry Mylar | ������������������������������ | 170