STEP-BY-STEP INSTRUCTIONS
G H
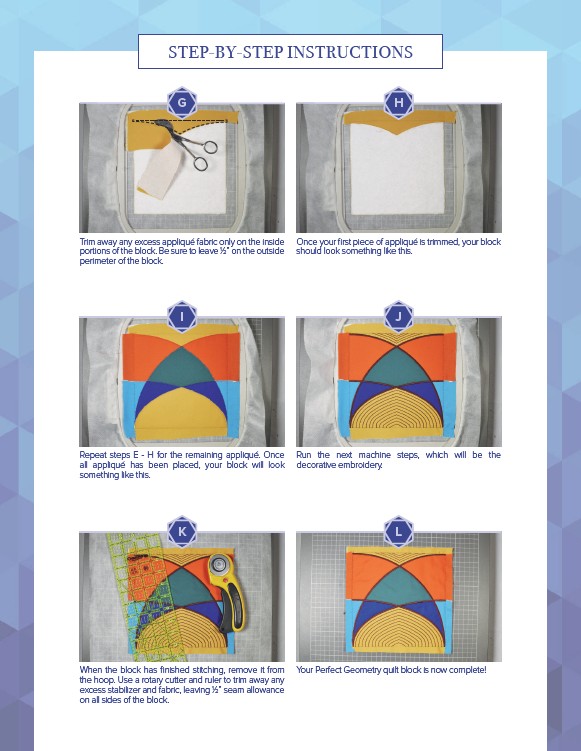
Trim away any excess appliqué fabric only on the inside
portions of the block. Be sure to leave 1⁄2” on the outside
perimeter of the block.
Repeat steps E - H for the remaining appliqué. Once
all appliqué has been placed, your block will look
something like this.
When the block has finished stitching, remove it from
the hoop. Use a rotary cutter and ruler to trim away any
excess stabilizer and fabric, leaving 1⁄2” seam allowance
on all sides of the block.
Once your first piece of appliqué is trimmed, your block
should look something like this.
Run the next machine steps, which will be the
decorative embroidery.
Your Perfect Geometry quilt block is now complete!
I
K
J
L