5 6
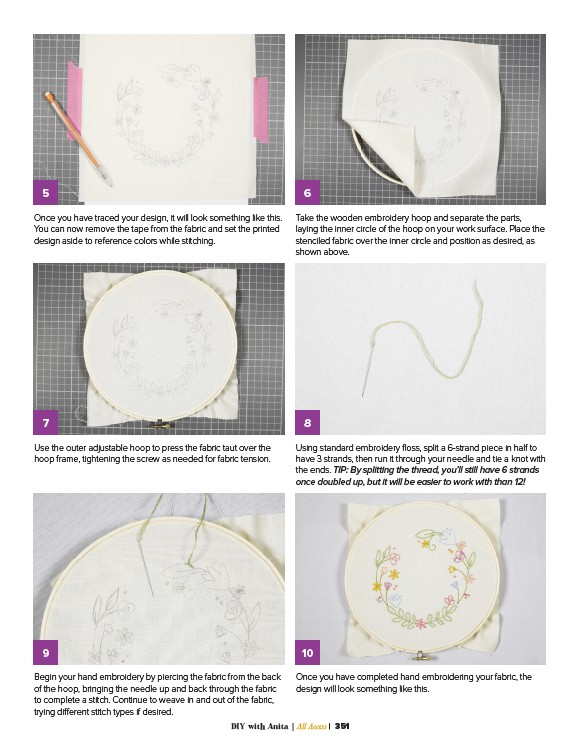
Once you have traced your design, it will look something like this.
You can now remove the tape from the fabric and set the printed
design aside to reference colors while stitching.
Take the wooden embroidery hoop and separate the parts,
laying the inner circle of the hoop on your work surface. Place the
stenciled fabric over the inner circle and position as desired, as
shown above.
7 8
Use the outer adjustable hoop to press the fabric taut over the
hoop frame, tightening the screw as needed for fabric tension.
Using standard embroidery floss, split a 6-strand piece in half to
have 3 strands, then run it through your needle and tie a knot with
the ends. TIP: By splitting the thread, you’ll still have 6 strands
once doubled up, but it will be easier to work with than 12!
9 10
Begin your hand embroidery by piercing the fabric from the back
of the hoop, bringing the needle up and back through the fabric
to complete a stitch. Continue to weave in and out of the fabric,
trying different stitch types if desired.
Once you have completed hand embroidering your fabric, the
design will look something like this.
DIY with Anita | All Access | 351