Cinched Scrap Bag
Step-by-Step Instructions
A B
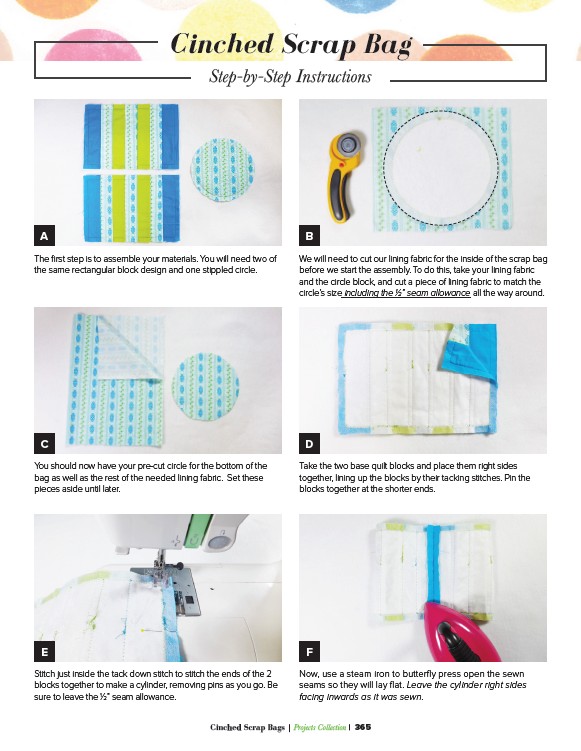
The first step is to assemble your materials. You will need two of
the same rectangular block design and one stippled circle.
C D
You should now have your pre-cut circle for the bottom of the
bag as well as the rest of the needed lining fabric. Set these
pieces aside until later.
We will need to cut our lining fabric for the inside of the scrap bag
before we start the assembly. To do this, take your lining fabric
and the circle block, and cut a piece of lining fabric to match the
circle’s size including the 1/2” seam allowance all the way around.
Take the two base quilt blocks and place them right sides
together, lining up the blocks by their tacking stitches. Pin the
blocks together at the shorter ends.
E F
Stitch just inside the tack down stitch to stitch the ends of the 2
blocks together to make a cylinder, removing pins as you go. Be
sure to leave the 1/2” seam allowance.
Now, use a steam iron to butterfly press open the sewn
seams so they will lay flat. Leave the cylinder right sides
facing inwards as it was sewn.
Cinched Scrap Bags | Projects Collection | 365