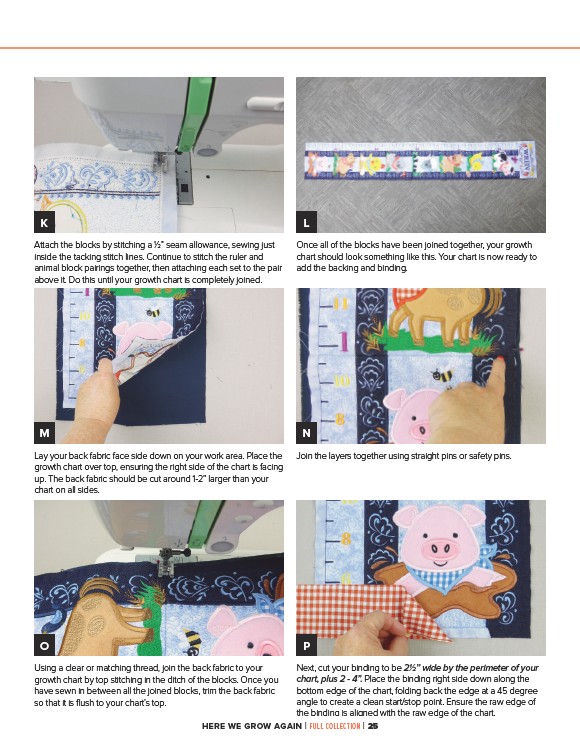
Once all of the blocks have been joined together, your growth
chart should look something like this. Your chart is now ready to
add the backing and binding.
K
Attach the blocks by stitching a 1⁄2” seam allowance, sewing just
inside the tacking stitch lines. Continue to stitch the ruler and
animal block pairings together, then attaching each set to the pair
above it. Do this until your growth chart is completely joined.
Lay your back fabric face side down on your work area. Place the
growth chart over top, ensuring the right side of the chart is facing
up. The back fabric should be cut around 1-2” larger than your
chart on all sides.
L
M
N
Join the layers together using straight pins or safety pins.
O
Using a clear or matching thread, join the back fabric to your
growth chart by top stitching in the ditch of the blocks. Once you
have sewn in between all the joined blocks, trim the back fabric
so that it is flush to your chart’s top.
P
Next, cut your binding to be 21⁄2” wide by the perimeter of your
chart, plus 2 - 4”. Place the binding right side down along the
bottom edge of the chart, folding back the edge at a 45 degree
angle to create a clean start/stop point. Ensure the raw edge of
the binding is aligned with the raw edge of the chart.
HERE WE GROW AGAIN | FULL COLLECTION | 25