ORGANZA APPLIQUÉ
STEP-BY-STEP INSTRUCTIONS
E F
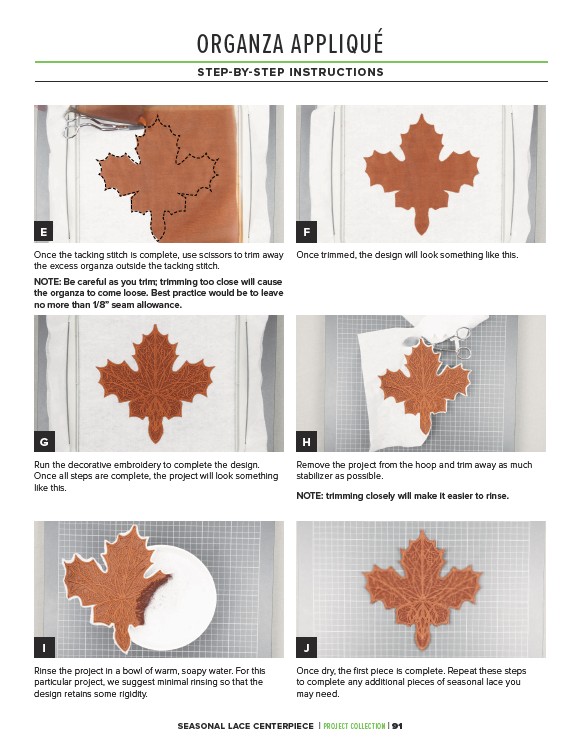
Once trimmed, the design will look something like this.
Once the tacking stitch is complete, use scissors to trim away
the excess organza outside the tacking stitch.
NOTE: Be careful as you trim; trimming too close will cause
the organza to come loose. Best practice would be to leave
no more than 1/8” seam allowance.
G H
Run the decorative embroidery to complete the design.
Once all steps are complete, the project will look something
like this.
Remove the project from the hoop and trim away as much
stabilizer as possible.
NOTE: trimming closely will make it easier to rinse.
I J
Rinse the project in a bowl of warm, soapy water. For this
particular project, we suggest minimal rinsing so that the
design retains some rigidity.
Once dry, the first piece is complete. Repeat these steps
to complete any additional pieces of seasonal lace you
may need.
SEASONAL LACE CENTERPIECE | PROJECT COLLECTION | 91