G H
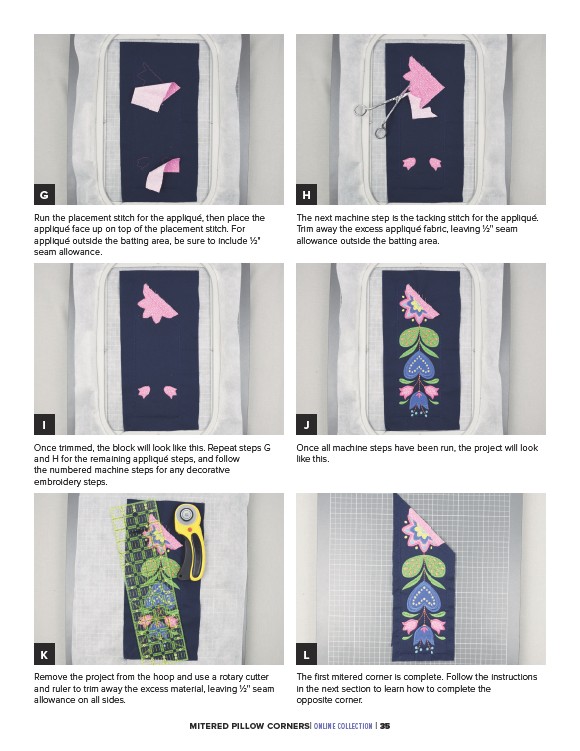
Run the placement stitch for the appliqué, then place the
appliqué face up on top of the placement stitch. For
appliqué outside the batting area, be sure to include 1⁄2"
seam allowance.
I J
Once trimmed, the block will look like this. Repeat steps G
and H for the remaining appliqué steps, and follow
the numbered machine steps for any decorative
embroidery steps.
K L
Remove the project from the hoop and use a rotary cutter
and ruler to trim away the excess material, leaving 1⁄2" seam
allowance on all sides.
The next machine step is the tacking stitch for the appliqué.
Trim away the excess appliqué fabric, leaving 1⁄2" seam
allowance outside the batting area.
Once all machine steps have been run, the project will look
like this.
The first mitered corner is complete. Follow the instructions
in the next section to learn how to complete the
opposite corner.
MITERED PILLOW CORNERS| ONLINE COLLECTION | 35