CREATING YOUR TAGS
STEP-BY-STEP INSTRUCTIONS
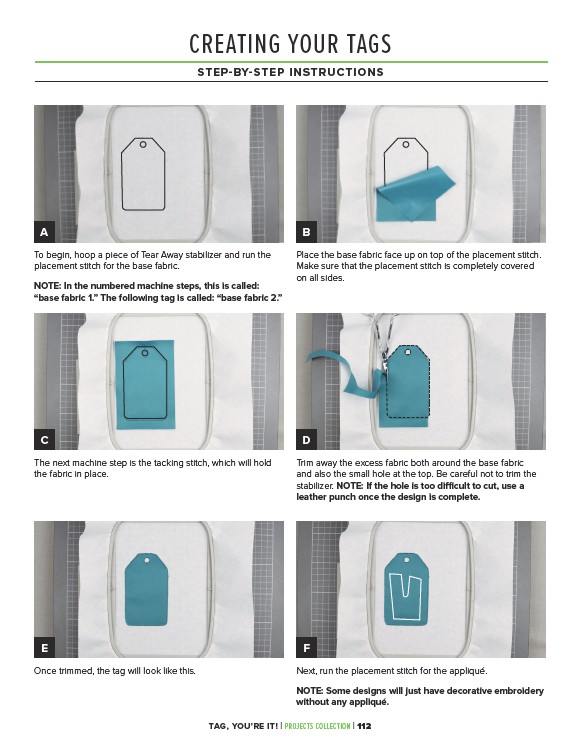
A B
Place the base fabric face up on top of the placement stitch.
Make sure that the placement stitch is completely covered
on all sides.
To begin, hoop a piece of Tear Away stabilizer and run the
placement stitch for the base fabric.
NOTE: In the numbered machine steps, this is called:
“base fabric 1.” The following tag is called: “base fabric 2.”
C D
The next machine step is the tacking stitch, which will hold
the fabric in place.
Trim away the excess fabric both around the base fabric
and also the small hole at the top. Be careful not to trim the
stabilizer. NOTE: If the hole is too difficult to cut, use a
leather punch once the design is complete.
E F
Once trimmed, the tag will look like this. Next, run the placement stitch for the appliqué.
NOTE: Some designs will just have decorative embroidery
without any appliqué.
TAG, YOU’RE IT! | PROJECTS COLLECTION | 112