STITCHING YOUR BAG
STEP-BY-STEP INSTRUCTIONS
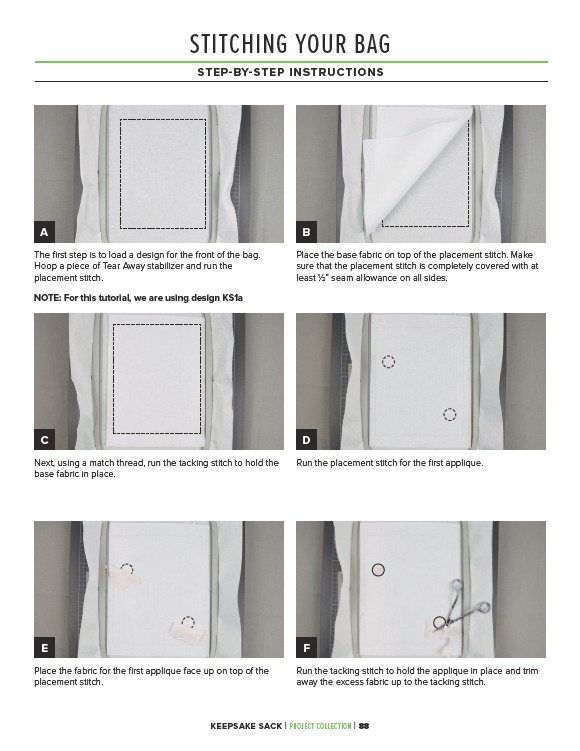
A B
Place the base fabric on top of the placement stitch. Make
sure that the placement stitch is completely covered with at
least 1⁄2” seam allowance on all sides.
The first step is to load a design for the front of the bag.
Hoop a piece of Tear Away stabilizer and run the
placement stitch.
NOTE: For this tutorial, we are using design KS1a
C D
Next, using a match thread, run the tacking stitch to hold the
base fabric in place.
Run the placement stitch for the first applique.
E F
Place the fabric for the first applique face up on top of the
placement stitch.
Run the tacking stitch to hold the applique in place and trim
away the excess fabric up to the tacking stitch.
KEEPSAKE SACK | PROJECT COLLECTION | 88