F
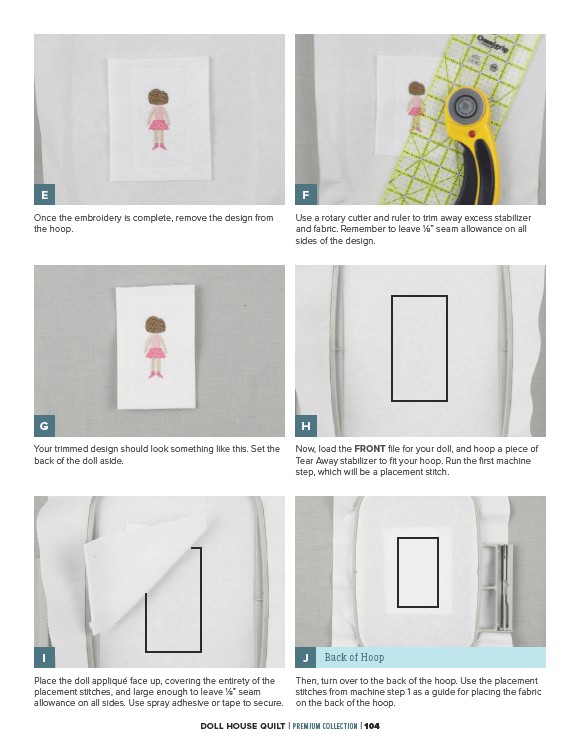
Once the embroidery is complete, remove the design from
the hoop.
Your trimmed design should look something like this. Set the
back of the doll aside.
Use a rotary cutter and ruler to trim away excess stabilizer
and fabric. Remember to leave 1⁄8” seam allowance on all
sides of the design.
Back of Hoop
DOLL HOUSE QUILT | PREMIUM COLLECTION | 104
E
G
H
I J
Place the doll appliqué face up, covering the entirety of the
placement stitches, and large enough to leave 1⁄8” seam
allowance on all sides. Use spray adhesive or tape to secure.
Now, load the FRONT file for your doll, and hoop a piece of
Tear Away stabilizer to fit your hoop. Run the first machine
step, which will be a placement stitch.
Then, turn over to the back of the hoop. Use the placement
stitches from machine step 1 as a guide for placing the fabric
on the back of the hoop.