CONSTRUCTING THE BAUBLE
STEP-BY-STEP INSTRUCTIONS
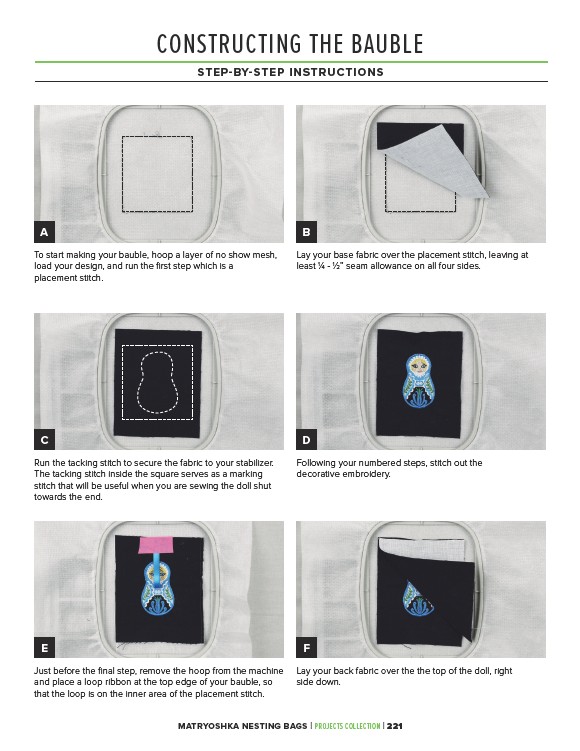
A B
Lay your base fabric over the placement stitch, leaving at
least 1⁄4 - 1⁄2” seam allowance on all four sides.
To start making your bauble, hoop a layer of no show mesh,
load your design, and run the first step which is a
placement stitch.
C D
Run the tacking stitch to secure the fabric to your stabilizer.
The tacking stitch inside the square serves as a marking
stitch that will be useful when you are sewing the doll shut
towards the end.
Following your numbered steps, stitch out the
decorative embroidery.
E F
Just before the final step, remove the hoop from the machine
and place a loop ribbon at the top edge of your bauble, so
that the loop is on the inner area of the placement stitch.
Lay your back fabric over the the top of the doll, right
side down.
MATRYOSHKA NESTING BAGS | PROJECTS COLLECTION | 221