STEP-BY-STEP INSTRUCTIONS
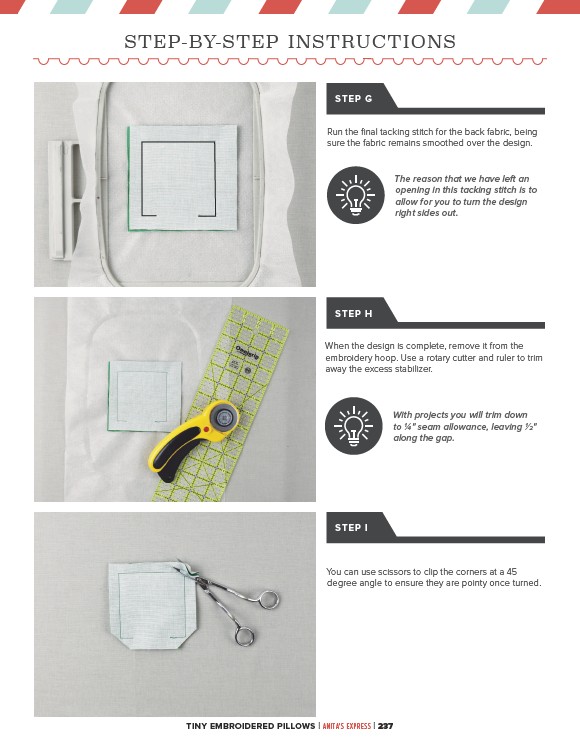
STEP G
Run the final tacking stitch for the back fabric, being
sure the fabric remains smoothed over the design.
STEP H
When the design is complete, remove it from the
embroidery hoop. Use a rotary cutter and ruler to trim
away the excess stabilizer.
STEP I
You can use scissors to clip the corners at a 45
degree angle to ensure they are pointy once turned.
TINY EMBROIDERED PILLOWS | ANITA'S EXPRESS | 237
The reason that we have left an
opening in this tacking stitch is to
allow for you to turn the design
right sides out.
With projects you will trim down
to 1⁄4" seam allowance, leaving 1⁄2"
along the gap.