Q R
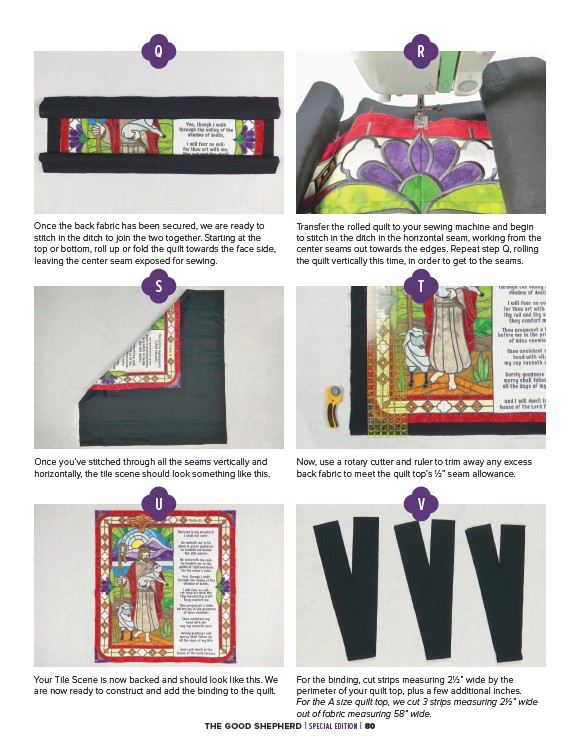
Transfer the rolled quilt to your sewing machine and begin
to stitch in the ditch in the horizontal seam, working from the
center seams out towards the edges. Repeat step Q, rolling
the quilt vertically this time, in order to get to the seams.
Once the back fabric has been secured, we are ready to
stitch in the ditch to join the two together. Starting at the
top or bottom, roll up or fold the quilt towards the face side,
leaving the center seam exposed for sewing.
S T
Once you’ve stitched through all the seams vertically and
horizontally, the tile scene should look something like this.
Now, use a rotary cutter and ruler to trim away any excess
back fabric to meet the quilt top’s 1⁄2” seam allowance.
U V
Your Tile Scene is now backed and should look like this. We
are now ready to construct and add the binding to the quilt.
For the binding, cut strips measuring 21⁄2” wide by the
perimeter of your quilt top, plus a few additional inches.
For the A size quilt top, we cut 3 strips measuring 21⁄2” wide
out of fabric measuring 58” wide.
THE GOOD SHEPHERD | SPECIAL EDITION | 80