STITCHING THE DESIGN
STEP-BY-STEP INSTRUCTIONS
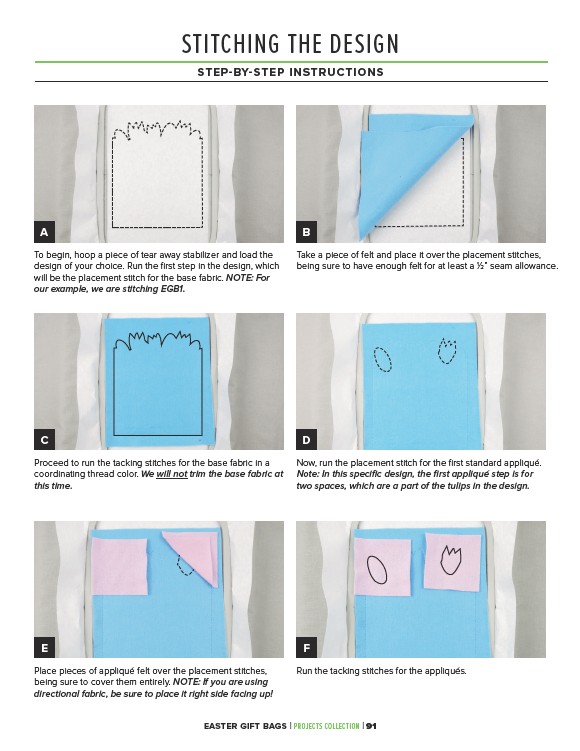
A B
Take a piece of felt and place it over the placement stitches,
being sure to have enough felt for at least a 1⁄2” seam allowance.
To begin, hoop a piece of tear away stabilizer and load the
design of your choice. Run the first step in the design, which
will be the placement stitch for the base fabric. NOTE: For
our example, we are stitching EGB1.
C D
Proceed to run the tacking stitches for the base fabric in a
coordinating thread color. We will not trim the base fabric at
this time.
Now, run the placement stitch for the first standard appliqué.
Note: In this specific design, the first appliqué step is for
two spaces, which are a part of the tulips in the design.
E F
Place pieces of appliqué felt over the placement stitches,
being sure to cover them entirely. NOTE: If you are using
directional fabric, be sure to place it right side facing up!
Run the tacking stitches for the appliqués.
EASTER GIFT BAGS | PROJECTS COLLECTION | 91