CONSTRUCTING YOUR GIFT BAG
STEP-BY-STEP INSTRUCTIONS
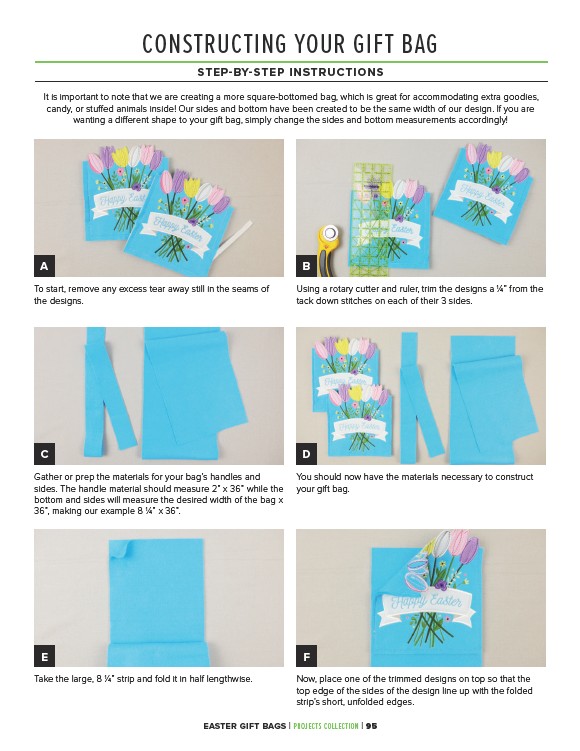
It is important to note that we are creating a more square-bottomed bag, which is great for accommodating extra goodies,
candy, or stuffed animals inside! Our sides and bottom have been created to be the same width of our design. If you are
wanting a different shape to your gift bag, simply change the sides and bottom measurements accordingly!
A B
Using a rotary cutter and ruler, trim the designs a 1⁄4” from the
tack down stitches on each of their 3 sides.
To start, remove any excess tear away still in the seams of
the designs.
C D
Gather or prep the materials for your bag’s handles and
sides. The handle material should measure 2” x 36” while the
bottom and sides will measure the desired width of the bag x
36”, making our example 8 1⁄4” x 36”.
You should now have the materials necessary to construct
your gift bag.
E F
Take the large, 8 1⁄4” strip and fold it in half lengthwise. Now, place one of the trimmed designs on top so that the
top edge of the sides of the design line up with the folded
strip’s short, unfolded edges.
EASTER GIFT BAGS | PROJECTS COLLECTION | 95