CUTTING OUT YOUR CARD
STEP-BY-STEP INSTRUCTIONS
A B
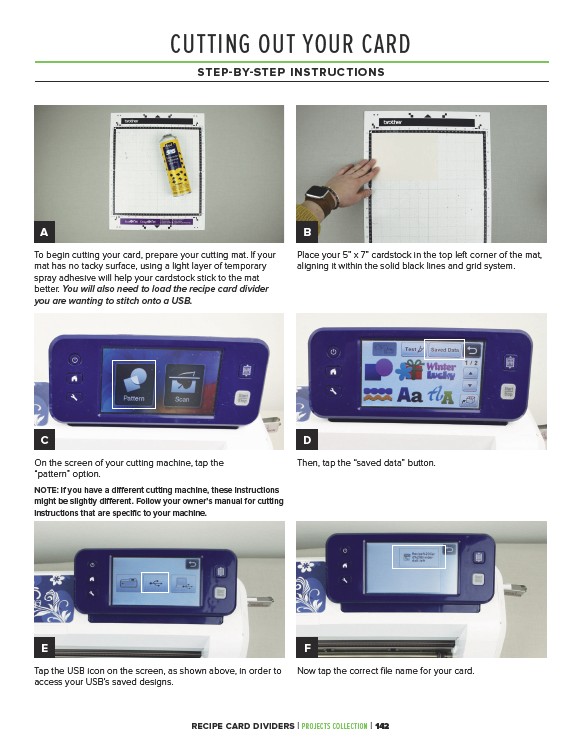
Place your 5” x 7” cardstock in the top left corner of the mat,
aligning it within the solid black lines and grid system.
On the screen of your cutting machine, tap the
“pattern” option.
NOTE: If you have a different cutting machine, these instructions
might be slightly different. Follow your owner’s manual for cutting
instructions that are specific to your machine.
Then, tap the “saved data” button.
E F
RECIPE CARD DIVIDERS | PROJECTS COLLECTION | 142
C
Tap the USB icon on the screen, as shown above, in order to
access your USB’s saved designs.
Now tap the correct file name for your card.
To begin cutting your card, prepare your cutting mat. If your
mat has no tacky surface, using a light layer of temporary
spray adhesive will help your cardstock stick to the mat
better. You will also need to load the recipe card divider
you are wanting to stitch onto a USB.
D