STITCHING YOUR DIVIDER
STEP-BY-STEP INSTRUCTIONS
A B
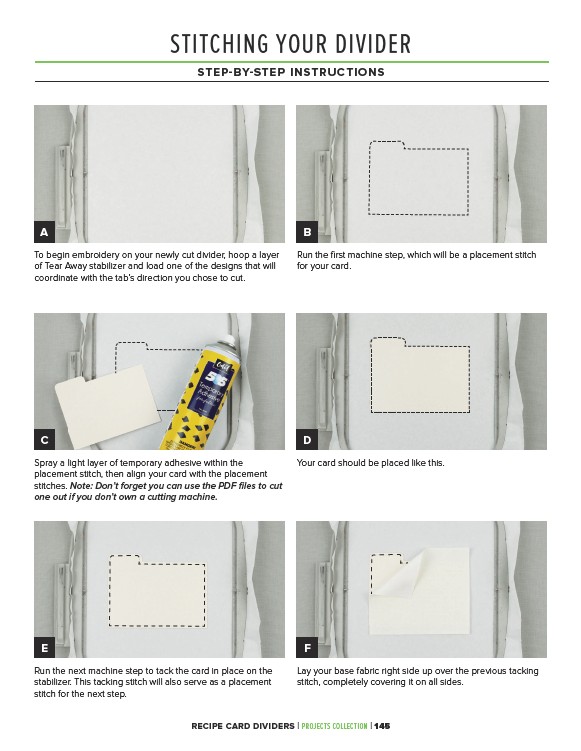
Run the first machine step, which will be a placement stitch
for your card.
To begin embroidery on your newly cut divider, hoop a layer
of Tear Away stabilizer and load one of the designs that will
coordinate with the tab’s direction you chose to cut.
C D
Spray a light layer of temporary adhesive within the
placement stitch, then align your card with the placement
stitches. Note: Don’t forget you can use the PDF files to cut
one out if you don’t own a cutting machine.
Your card should be placed like this.
E F
Run the next machine step to tack the card in place on the
stabilizer. This tacking stitch will also serve as a placement
stitch for the next step.
Lay your base fabric right side up over the previous tacking
stitch, completely covering it on all sides.
RECIPE CARD DIVIDERS | PROJECTS COLLECTION | 145