CREATING A PRINTED BASE FABRIC BLOCK
STEP-BY-STEP INSTRUCTIONS
A B
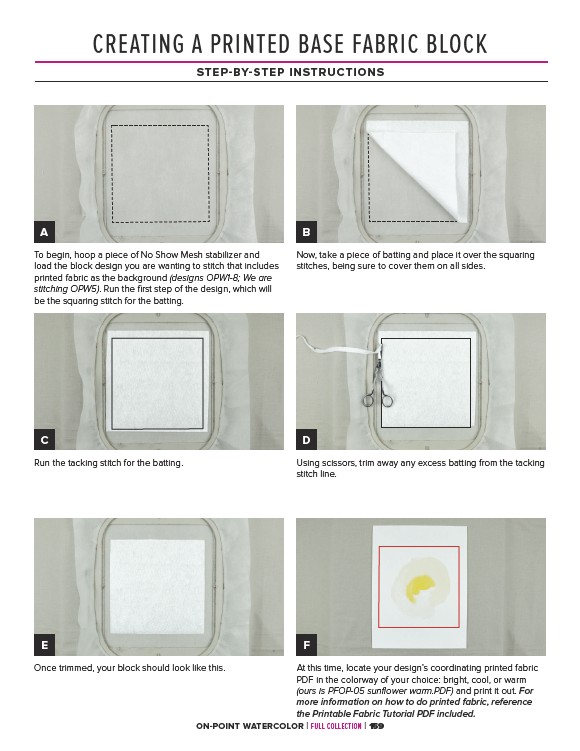
Now, take a piece of batting and place it over the squaring
stitches, being sure to cover them on all sides.
To begin, hoop a piece of No Show Mesh stabilizer and
load the block design you are wanting to stitch that includes
printed fabric as the background (designs OPW1-8; We are
stitching OPW5). Run the first step of the design, which will
be the squaring stitch for the batting.
C D
Run the tacking stitch for the batting. Using scissors, trim away any excess batting from the tacking
stitch line.
E F
Once trimmed, your block should look like this. At this time, locate your design’s coordinating printed fabric
PDF in the colorway of your choice: bright, cool, or warm
(ours is PFOP-05 sunflower warm.PDF) and print it out. For
more information on how to do printed fabric, reference
the Printable Fabric Tutorial PDF included.
ON-POINT WATERCOLOR | FULL COLLECTION | 159