STITCHING OUT YOUR STOCKING
STEP-BY-STEP INSTRUCTIONS
A B
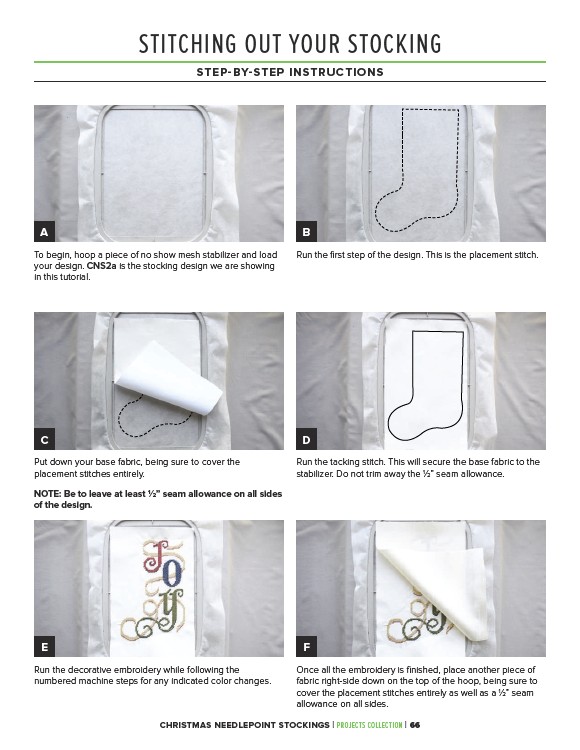
Run the first step of the design. This is the placement stitch.
To begin, hoop a piece of no show mesh stabilizer and load
your design. CNS2a is the stocking design we are showing
in this tutorial.
C D
Put down your base fabric, being sure to cover the
placement stitches entirely.
NOTE: Be to leave at least 1⁄2” seam allowance on all sides
of the design.
Run the tacking stitch. This will secure the base fabric to the
stabilizer. Do not trim away the 1⁄2” seam allowance.
E F
Run the decorative embroidery while following the
numbered machine steps for any indicated color changes.
Once all the embroidery is finished, place another piece of
fabric right-side down on the top of the hoop, being sure to
cover the placement stitches entirely as well as a 1⁄2” seam
allowance on all sides.
CHRISTMAS NEEDLEPOINT STOCKINGS | PROJECTS COLLECTION | 66