S T
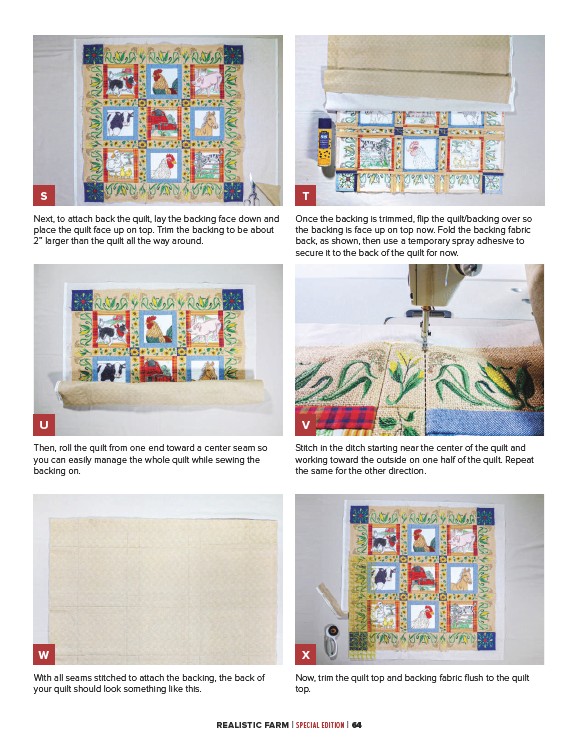
Next, to attach back the quilt, lay the backing face down and
place the quilt face up on top. Trim the backing to be about
2” larger than the quilt all the way around.
U V
Then, roll the quilt from one end toward a center seam so
you can easily manage the whole quilt while sewing the
backing on.
W X
With all seams stitched to attach the backing, the back of
your quilt should look something like this.
Once the backing is trimmed, flip the quilt/backing over so
the backing is face up on top now. Fold the backing fabric
back, as shown, then use a temporary spray adhesive to
secure it to the back of the quilt for now.
Stitch in the ditch starting near the center of the quilt and
working toward the outside on one half of the quilt. Repeat
the same for the other direction.
Now, trim the quilt top and backing fabric flush to the quilt
top.
REALISTIC FARM | SPECIAL EDITION | 64