Embroidery
STEP- BY- STEP
A B
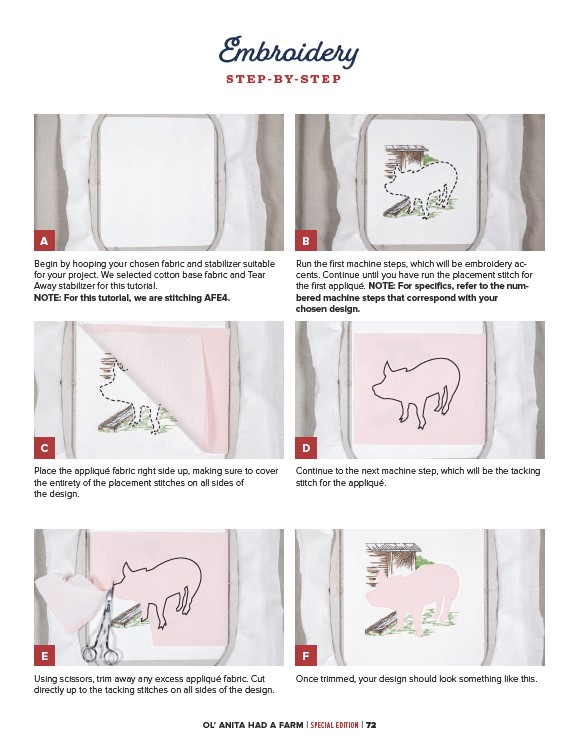
Run the first machine steps, which will be embroidery accents.
Continue until you have run the placement stitch for
the first appliqué. NOTE: For specifics, refer to the numbered
machine steps that correspond with your
chosen design.
Begin by hooping your chosen fabric and stabilizer suitable
for your project. We selected cotton base fabric and Tear
Away stabilizer for this tutorial.
NOTE: For this tutorial, we are stitching AFE4.
C D
Place the appliqué fabric right side up, making sure to cover
the entirety of the placement stitches on all sides of
the design.
Continue to the next machine step, which will be the tacking
stitch for the appliqué.
E F
Using scissors, trim away any excess appliqué fabric. Cut
directly up to the tacking stitches on all sides of the design.
Once trimmed, your design should look something like this.
OL’ ANITA HAD A FARM | SPECIAL EDITION | 72