BENCH CUSHION
CREATING AND ATTACHING THE PIPING
QUILT BLOCK REMIX | ALL ACCESS | 242
1
3
5
2
4
6
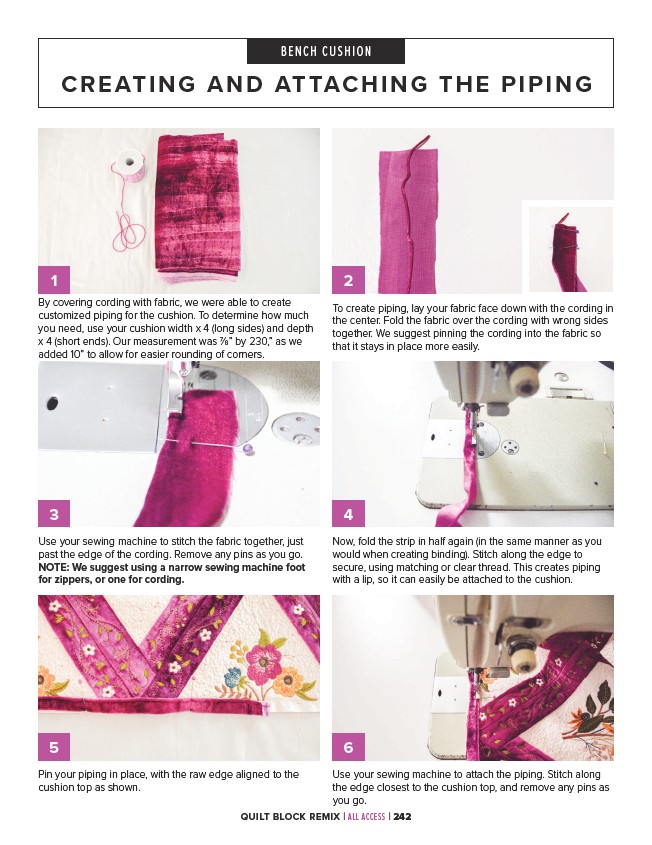
Use your sewing machine to stitch the fabric together, just
past the edge of the cording. Remove any pins as you go.
NOTE: We suggest using a narrow sewing machine foot
for zippers, or one for cording.
Now, fold the strip in half again (in the same manner as you
would when creating binding). Stitch along the edge to
secure, using matching or clear thread. This creates piping
with a lip, so it can easily be attached to the cushion.
Use your sewing machine to attach the piping. Stitch along
the edge closest to the cushion top, and remove any pins as
you go.
Pin your piping in place, with the raw edge aligned to the
cushion top as shown.
To create piping, lay your fabric face down with the cording in
the center. Fold the fabric over the cording with wrong sides
together. We suggest pinning the cording into the fabric so
that it stays in place more easily.
By covering cording with fabric, we were able to create
customized piping for the cushion. To determine how much
you need, use your cushion width x 4 (long sides) and depth
x 4 (short ends). Our measurement was 7⁄8” by 230,” as we
added 10” to allow for easier rounding of corners.