G H
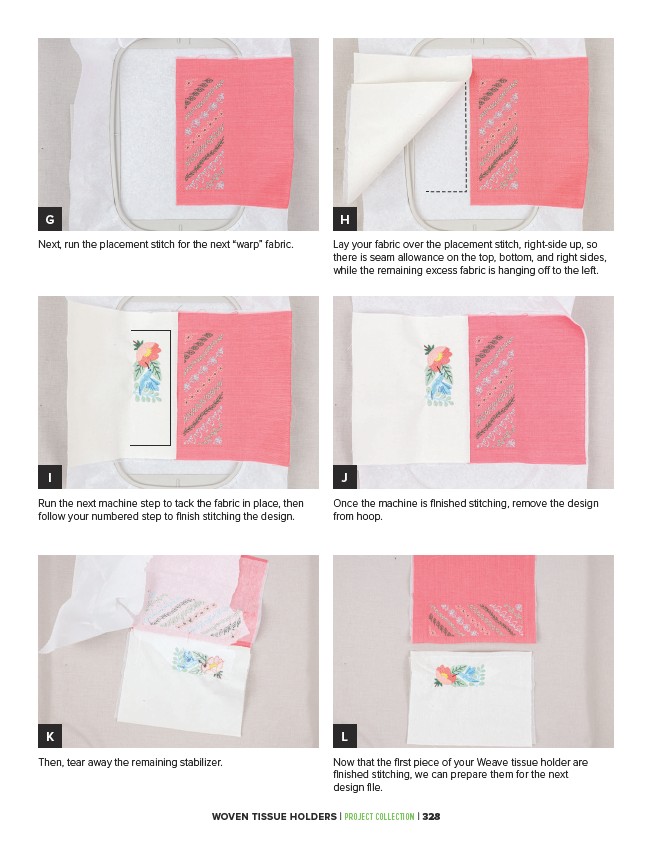
Next, run the placement stitch for the next “warp” fabric.
I J
Run the next machine step to tack the fabric in place, then
follow your numbered step to finish stitching the design.
K L
Then, tear away the remaining stabilizer.
Lay your fabric over the placement stitch, right-side up, so
there is seam allowance on the top, bottom, and right sides,
while the remaining excess fabric is hanging off to the left.
Once the machine is finished stitching, remove the design
from hoop.
Now that the first piece of your Weave tissue holder are
finished stitching, we can prepare them for the next
design file.
WOVEN TISSUE HOLDERS | PROJECT COLLECTION | 328